Sig Rascal 110 #1 Rebuild
Sig Rascal 110 #1 - UMN UAV Project
Next steps
- Come up with a better solution for securing the tank.
- Redo top nose cover job?
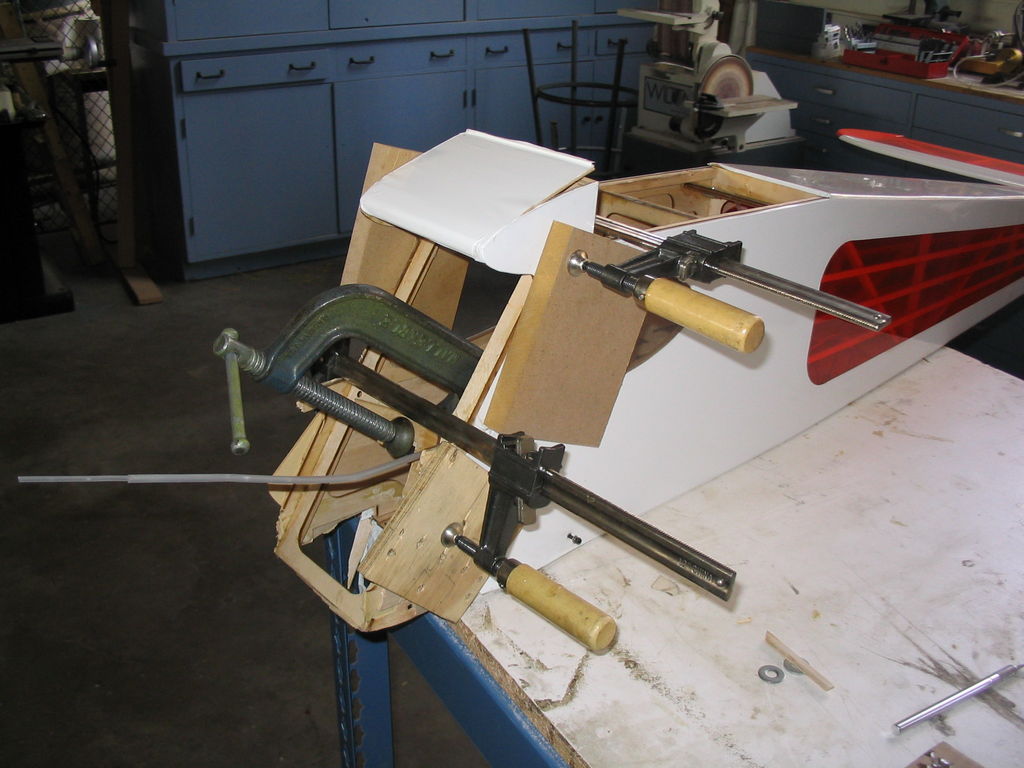
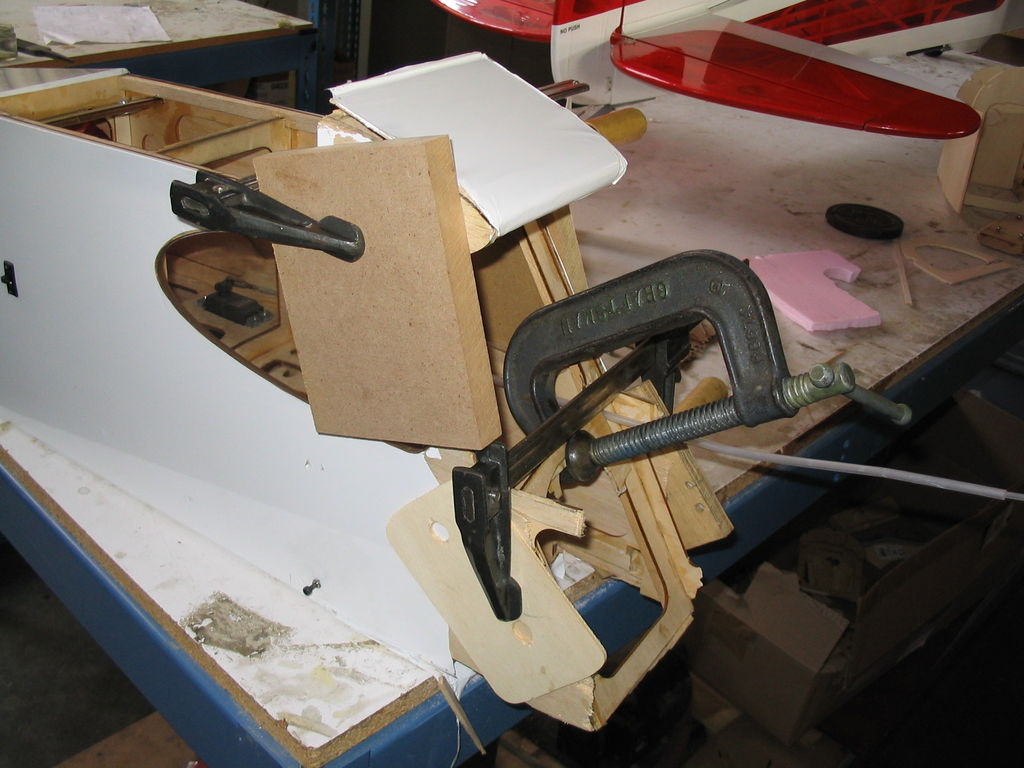
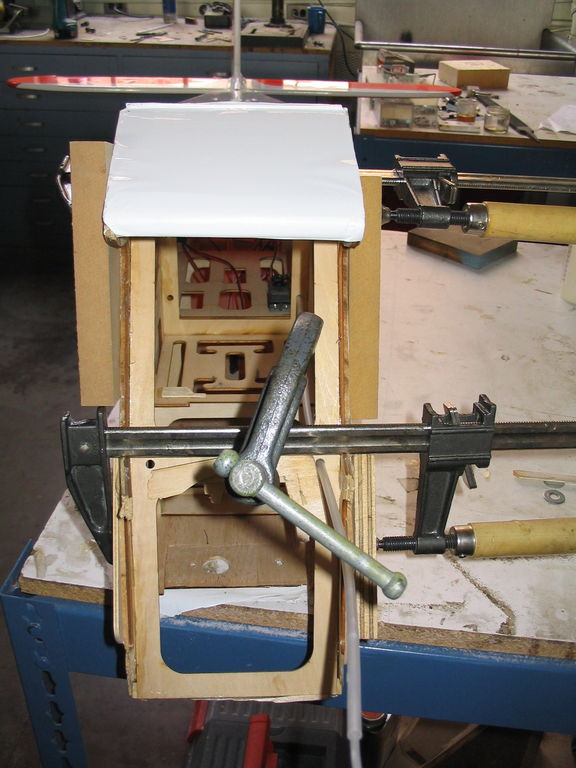
- Cut and fit cowl.
- Purchase replacement windshield (?)
October 20, 2006
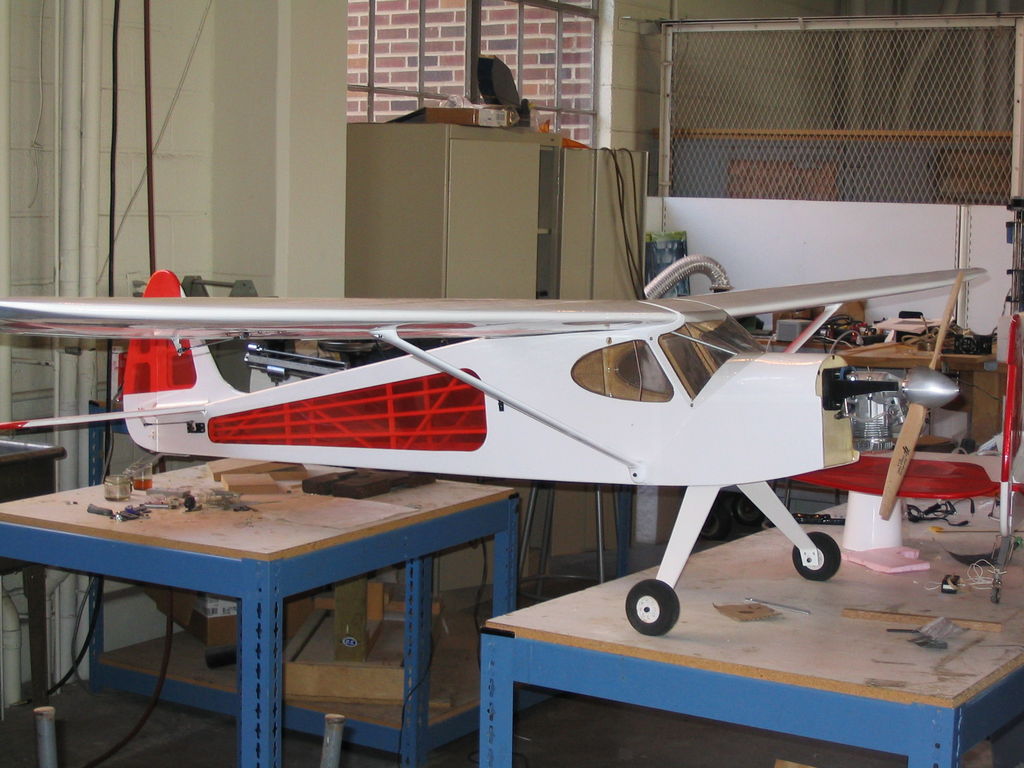
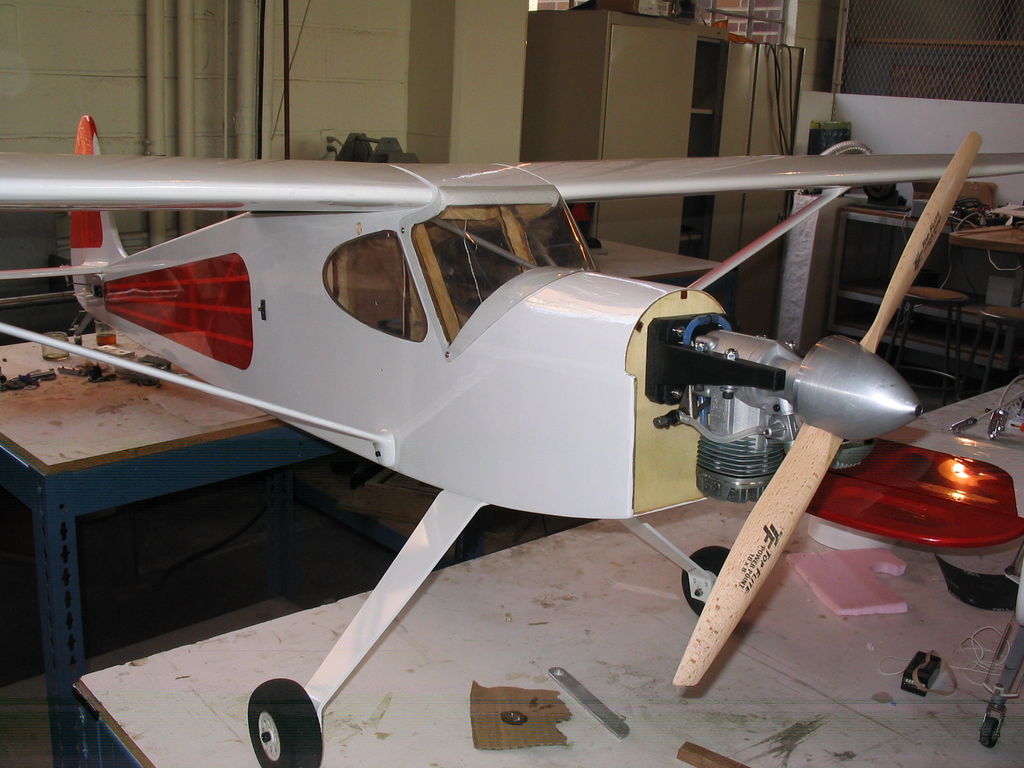
This morning I re-maidened Rascal #1. I had to work through some minorhardware issues, but the structure and rebuild all held together well,and the airplane flew straight and true and as good as it ever has. I’m very happy with the outcome, and very glad to have this airplane back on active flying status.
October 19, 2006
This evening I ran the engine for the first time after the crash. Everything seemed to perform well. I think I may try to re-maiden tomorrow if the weather is ok.
October 2, 2006
The battery and reciever and crystal arrived today. I tested to makesure they all work. I brought the aircraft home this evening and mounted the receiver, battery, and volt-watch unit. I still need to secure the antenna. I’m running out of things I can think of todo before test flying!
September 29, 2006
Begin putting the damaged right wing back together. I epoxied the wing joiner box back together so it is secure again and then a rebuilt and sheeted the first inboard section of leading edge back to the main spar. Finally I sanded and covered it and (tada!) the wing is done!
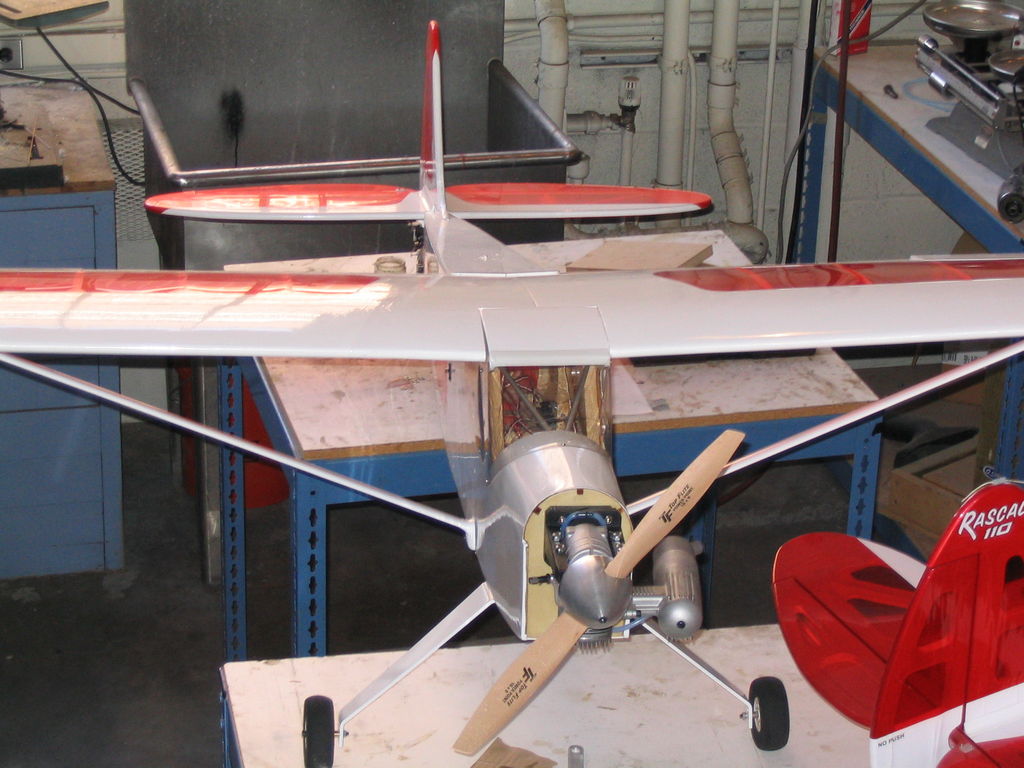
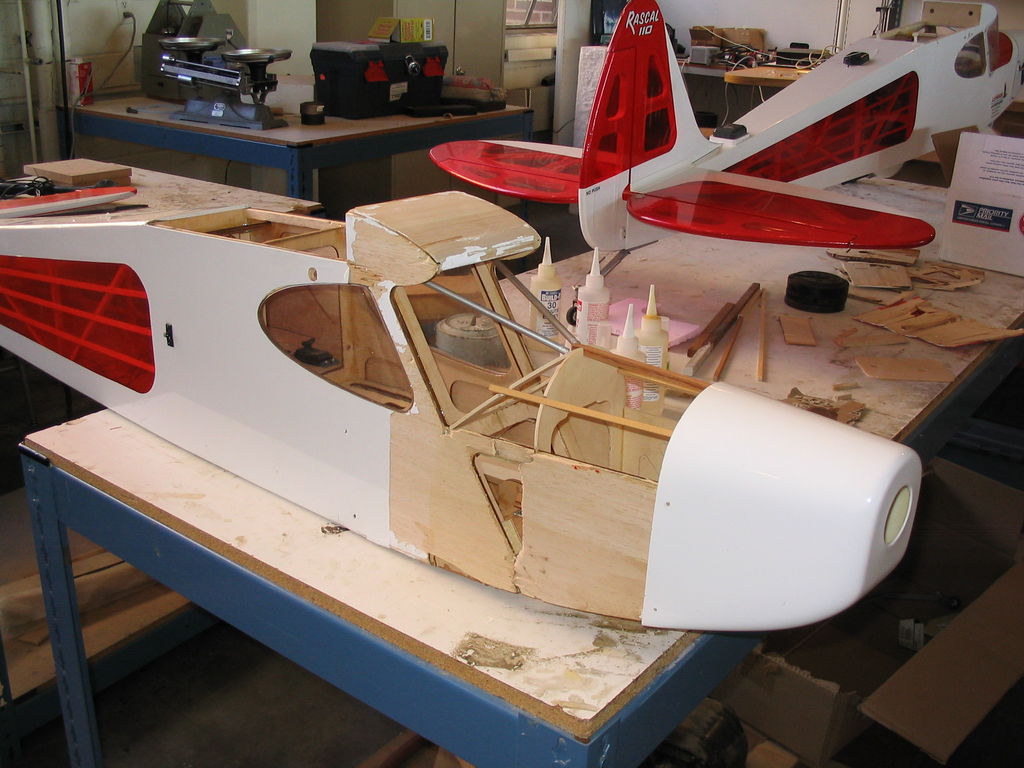
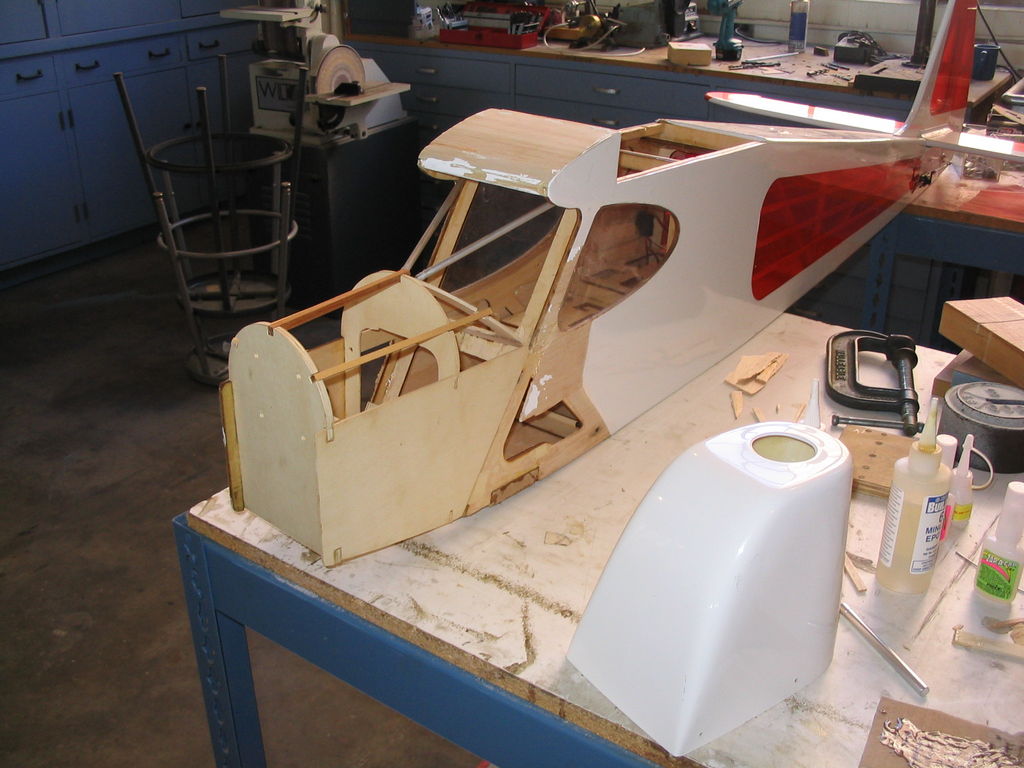
We are really close to being ready to fly! Just waiting on the receiver and battery now. I will cut and fit the cowl after we successfully test fly and after I’ve regained my confidence in this engine.

September 28, 2006
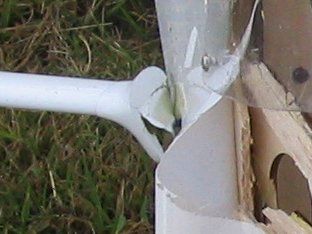
Mixed up some epoxy and sawdust and used that to fill in the shattered end of the right wing strut. I sanded this down to shape, redrilled the hole, and threw a quick coat of white paint on it. Good as new. 🙂 Here are before (damaged) and after (fixed) shots.

September 27, 2006
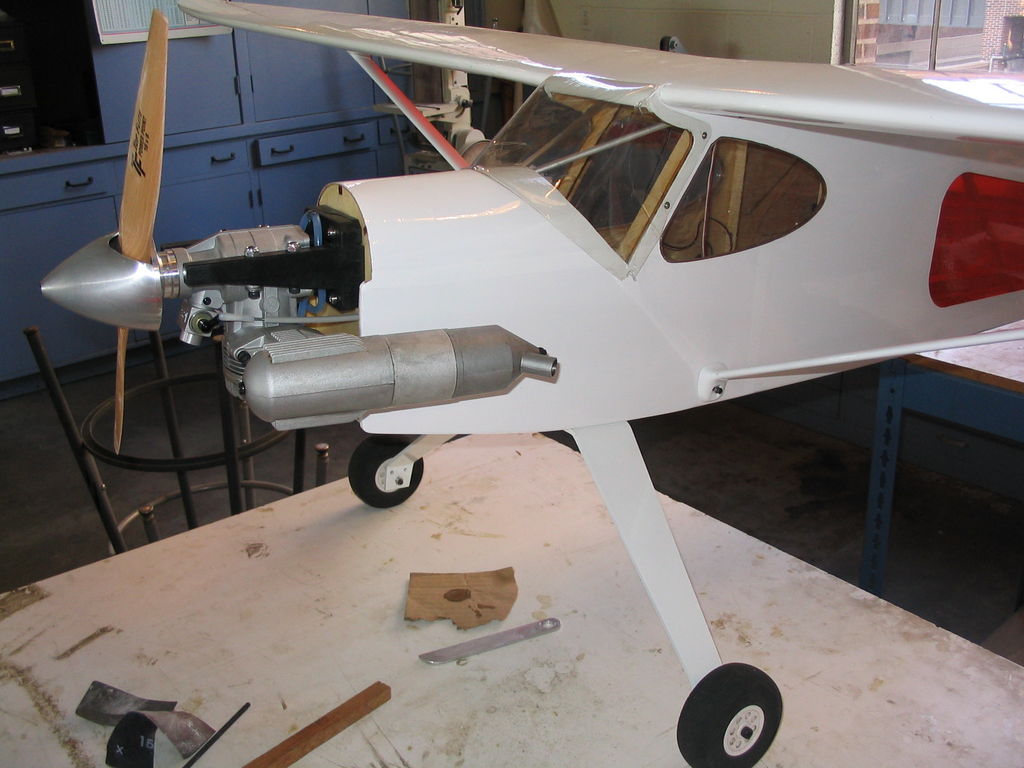
Installed the engine and muffler. Reassembled and installed the main gear. Cleaned up the wings in advance of inspecting and repairing them. Inspected the damaged wing strut and determined it is fixable.
September 26, 2006
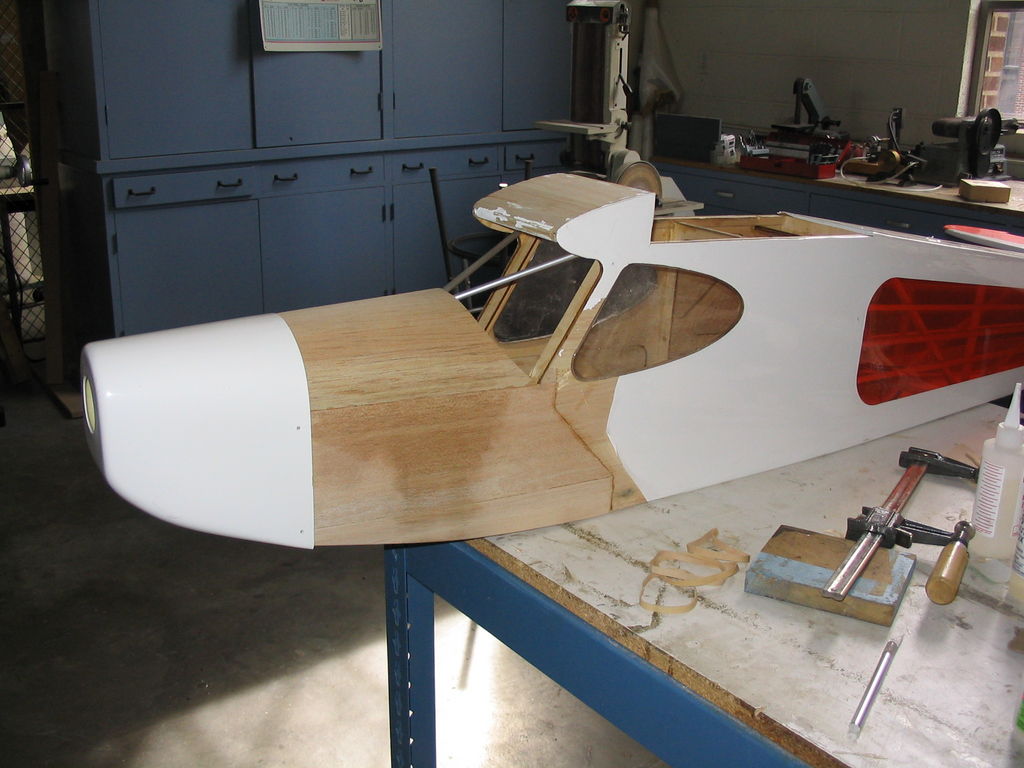
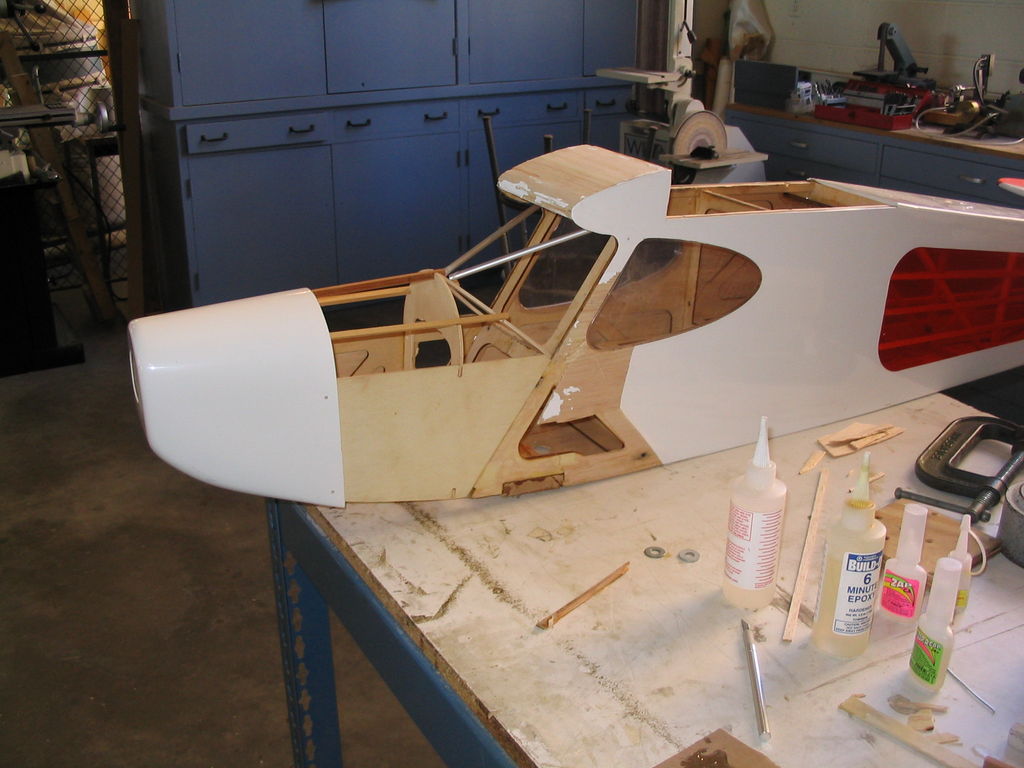
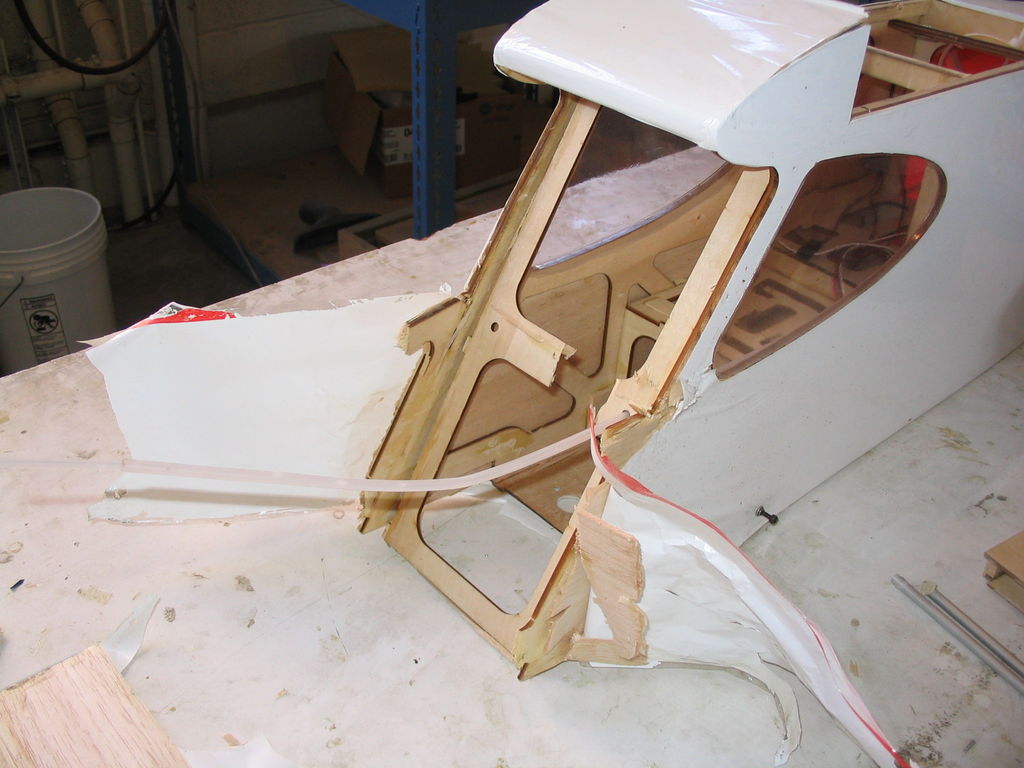
I recovered the front of the fuselage in white monocote. The top of the nose didn’t turn out nearly as well as I had hoped so I may cut that off and redo. We ordered a receiver and battery. I reinstalled the tail wheel assembly and the canopy.
September 25, 2006
Test mounted the engine and rigged the throttle linkage. Next step is to cover the front of the fuselage.
September 22, 2006
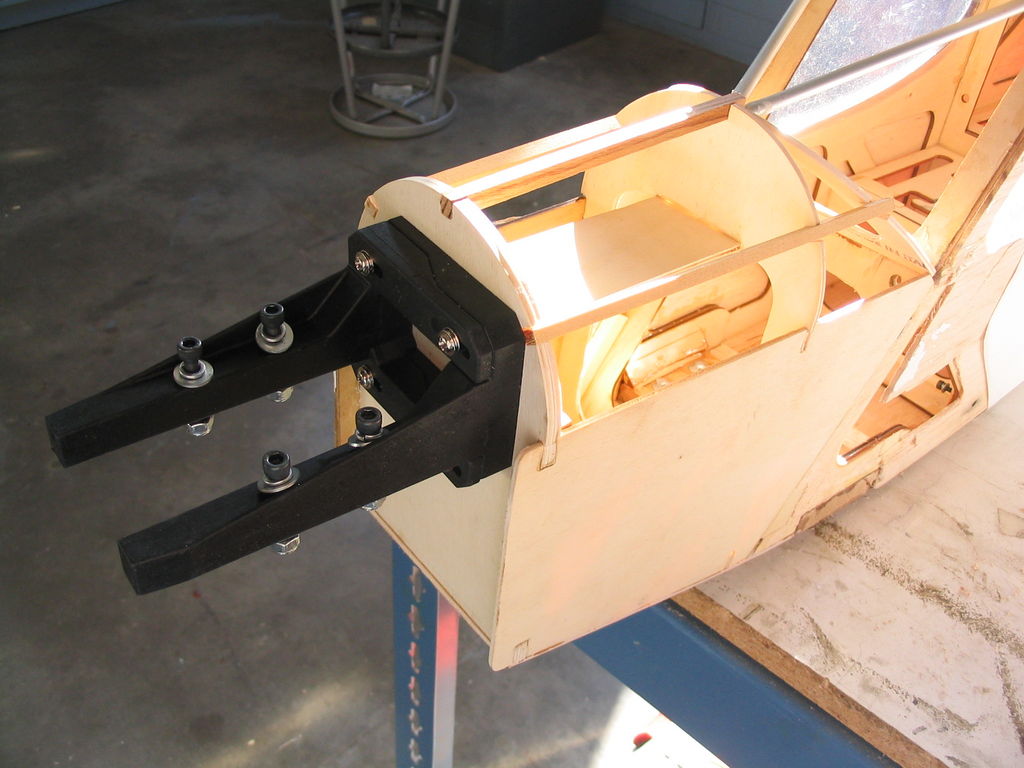
Worked on installing the fuel tank. Routed the throttle linkage housing.
September 19, 2006
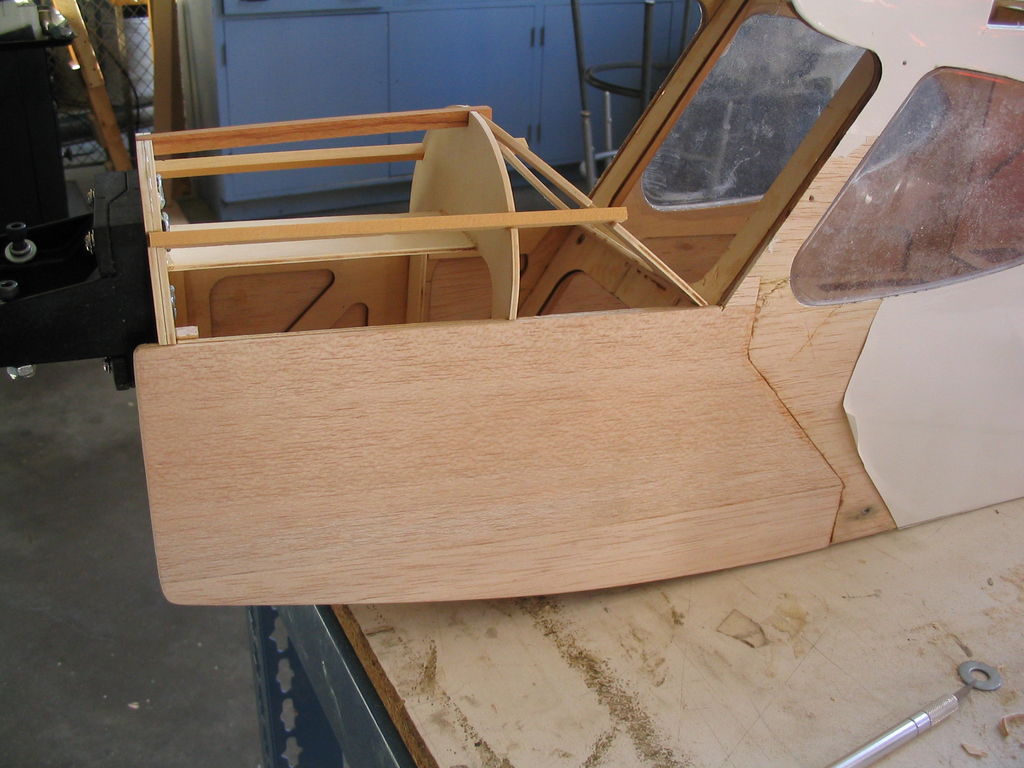
Secured the front wing support (where the wing dowls plug into.) Glued in forward cabin support rods.
September 18, 2006
Epoxy seal/paint the outside firewall. Filled in some of the gaps/cracks with balsa filler.
September 15, 2006
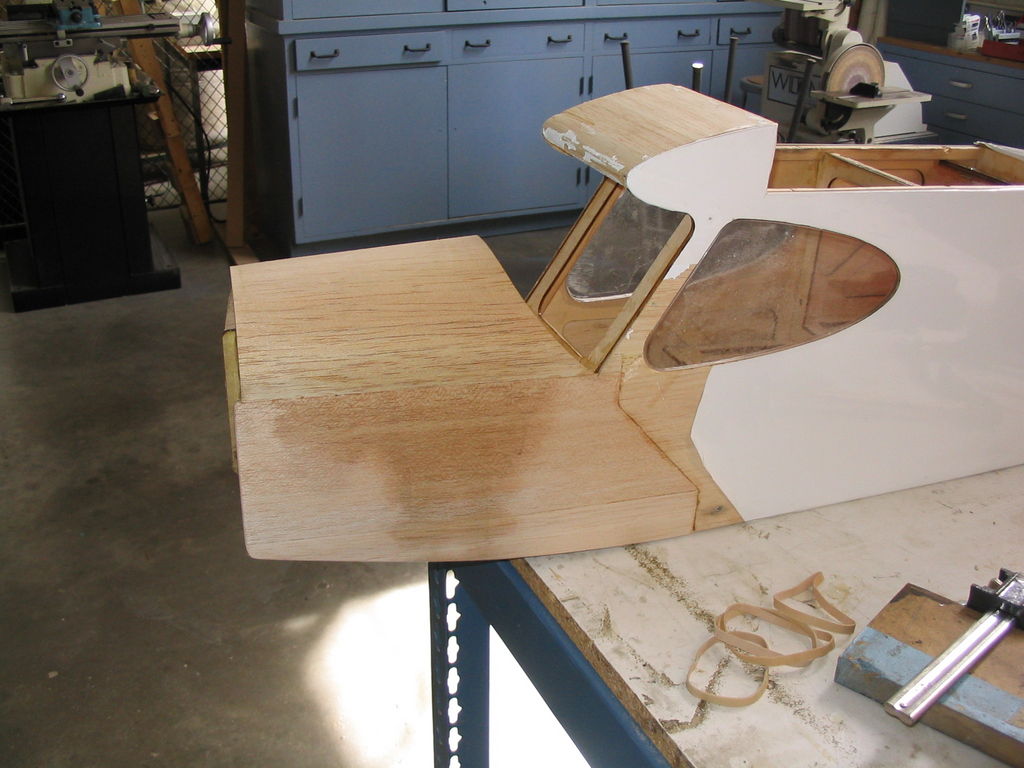
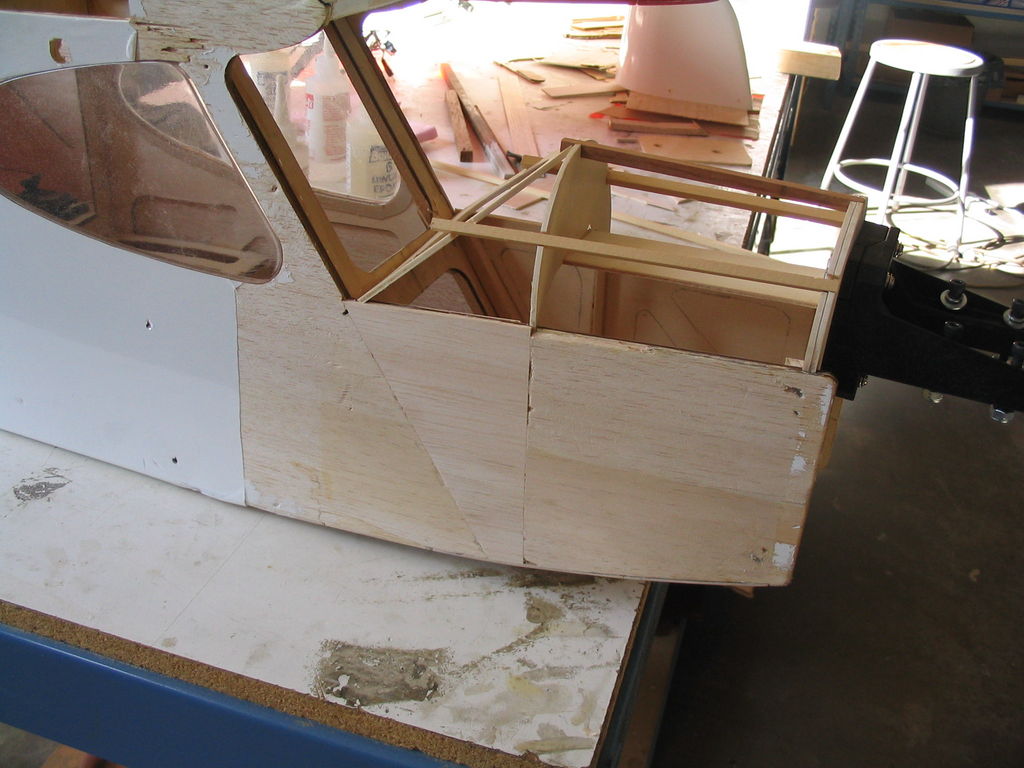
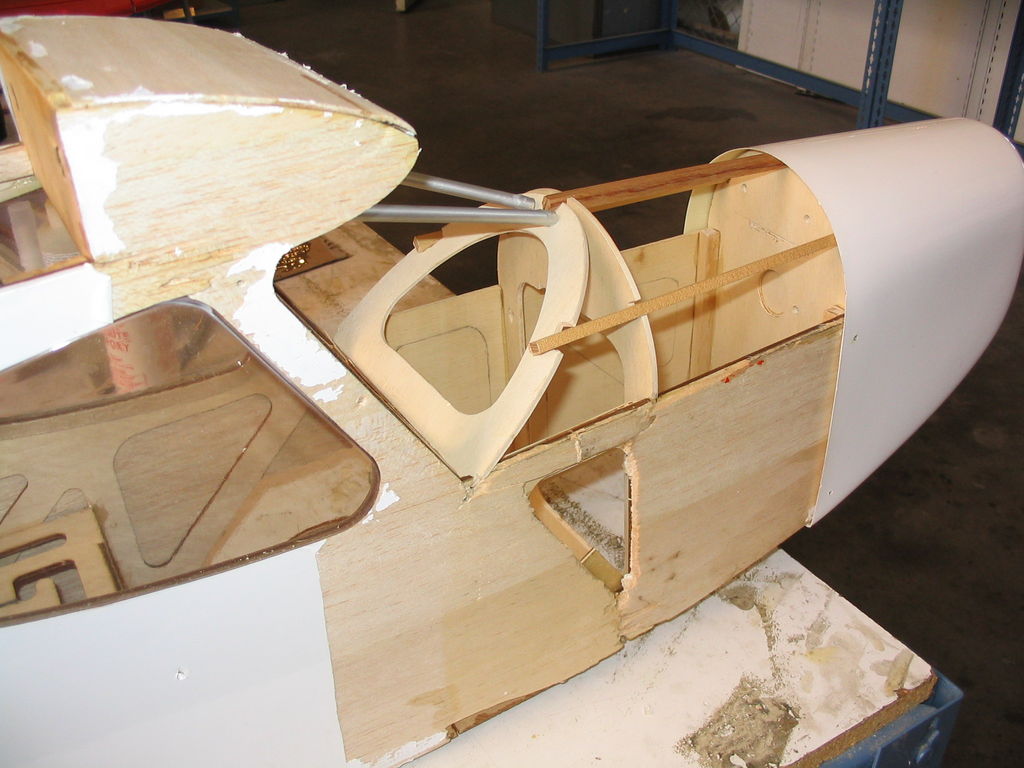
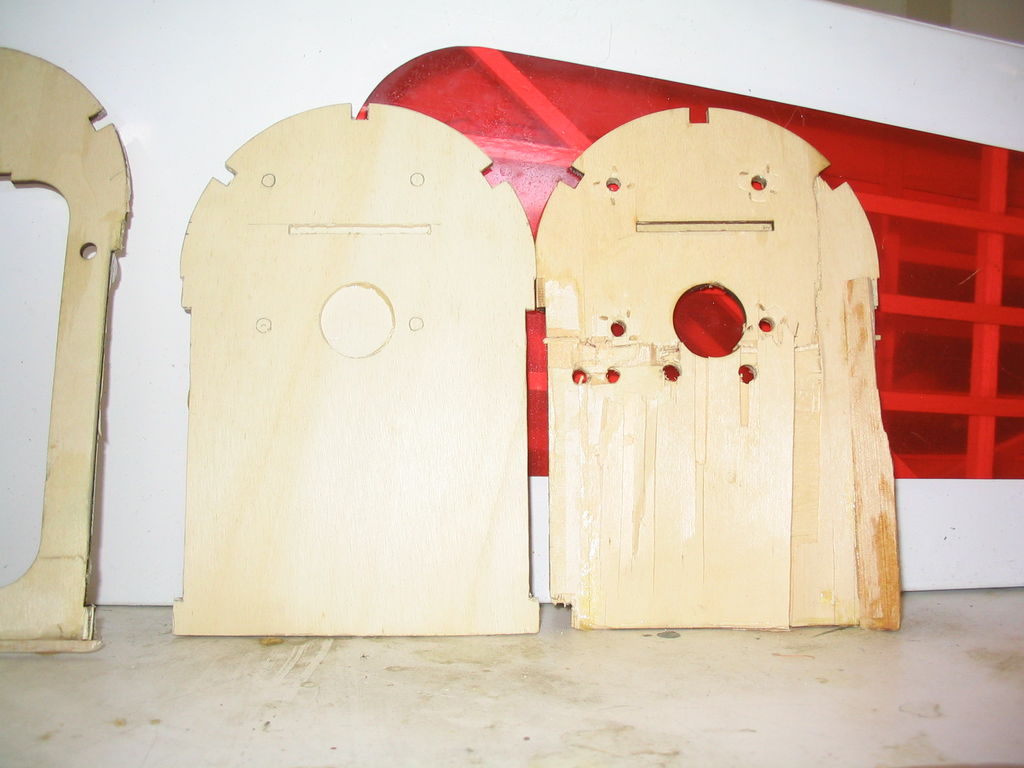
Today I glued in the top nose support stringers. Then starting with the cracked up nose sheeting from the original, I drew a rough template of the shape the sheeting needed to be. I transfered that to 1/16th sheeting and did some test fitting and trimming. Finally I squirted it up with windex which was what I had on hand and the sheeting pretty much melted around the curve …cool. 🙂 The final results looks better on the left side than on the right but I guess that just means I need to do a little filling and sanding.
Posing with the cowl and the cabin support rods.
September 14, 2006
Reinforce left front nose side splice internally with some hardwood square stock.
Finished sheeting both sides of the front fuselage (i.e. sides of the nose.)
September 13, 2006
Reinforce wing leading edge bulkhead reinforcements. I’m compensating here for an earlier mistake where the bottom portion of these reinforcments didn’tget clamped in where they should have been and thus there is some ugly gaps. It will be non-visible when the fuselage is all sheeted, but I just wanted to make sure it’s solid structurally.
I installed (and tack epoxied) the engine mount blind nuts onto the back side of the firewall. These are a horrible pain to deal with once everything is sheeted in … probably the hardest part of assembling the stock Rascal. So they are installed now and I don’t have to worry about them later.
Finally, I cross sheeted the bottom of fuselage forward of the main gear block. This adds a surprising amount of rigidity to the nose section which is what I was hoping/planning. I also attached the original sheeting to the rear of the main gear block. (Little details …)

September 12, 2006
Today I spent a few moments fabricating and installing the firewall side reinforcements. I also fabricated the nose top stringers.
September 11, 2006
Today I glued in the main landing gear block and supporting structure. I also dug around the shop and found the hardwood stringers I’ll need to support the balsa sheeting on the top of the nose section. When I test fit the cowl, she’s actually starting to look a bit like her old self again! Maybe there is hope after all. 🙂
September 8, 2006
I spent a few more minutes fiddling with the fuselage. I found several cracks and splits in the cabin roof where the wing dowls insert, specifically the sheeting forward of that.
I also secured several more cracks and splits in the bulkheads and various places I found them. I epoxied the split off pieces back onto the landing gear mounting block.
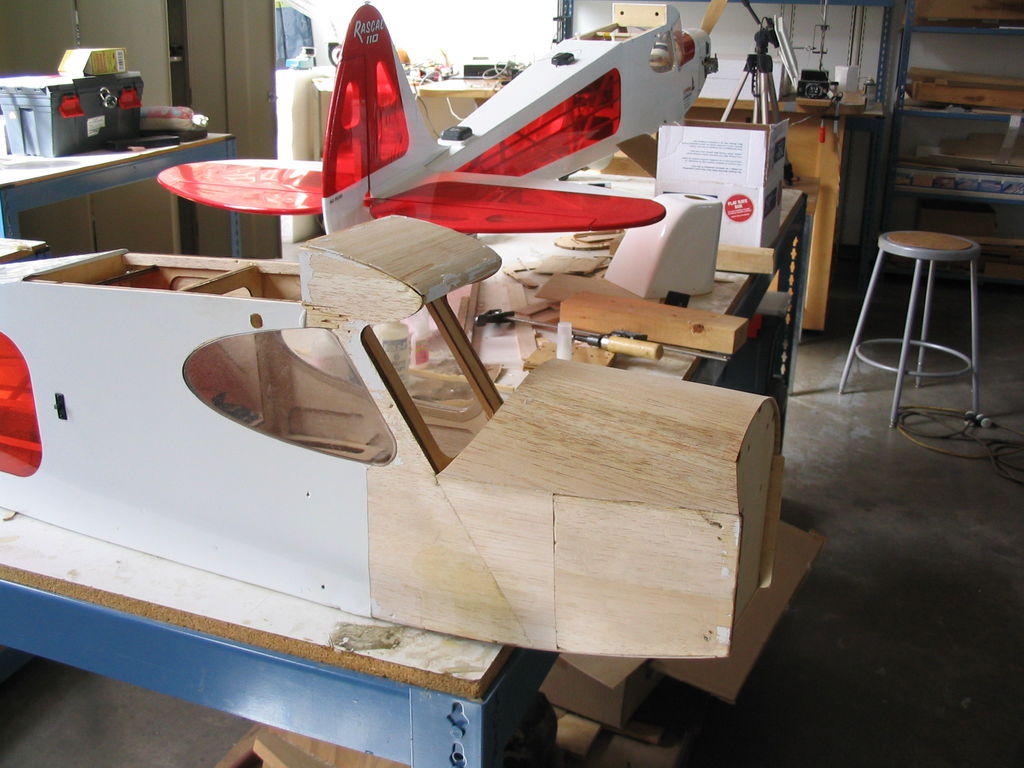
I glued the cracks and splits in the right side forward nose section (shown in test fit configuration in IMG_3993 in the Sep. 7 entry.) I finalized my scheme to splice in the left side nose piece to the original. It will involve a number of doublers, some beefy square stock, and a big mess of epoxy.
Finally, I began to reassemble the nose section.
September 7, 2006
A week ago I scored a new replacement cowl from a very kind fellow modeller who was willing to donate his spare to the cause.
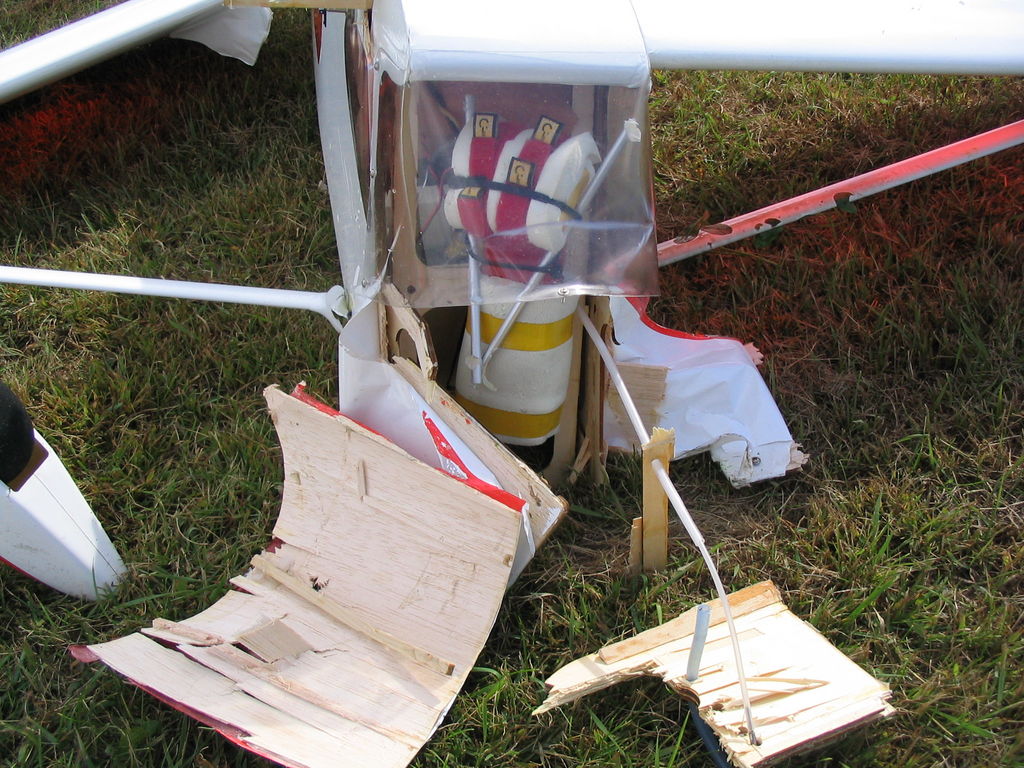
Today I did some work gluing the split clam shell that was the fuselage back together. From the wing trailing edge foward split out like a big clam shell. From the wing leading edge forward is just splinters. After today I should mostly have the wing leading edge back to the tail all fixed up and solid again.
Yes, it still looks pretty ugly, but an amazing amount of rebuild progress has actually been made:
May 30, 2006
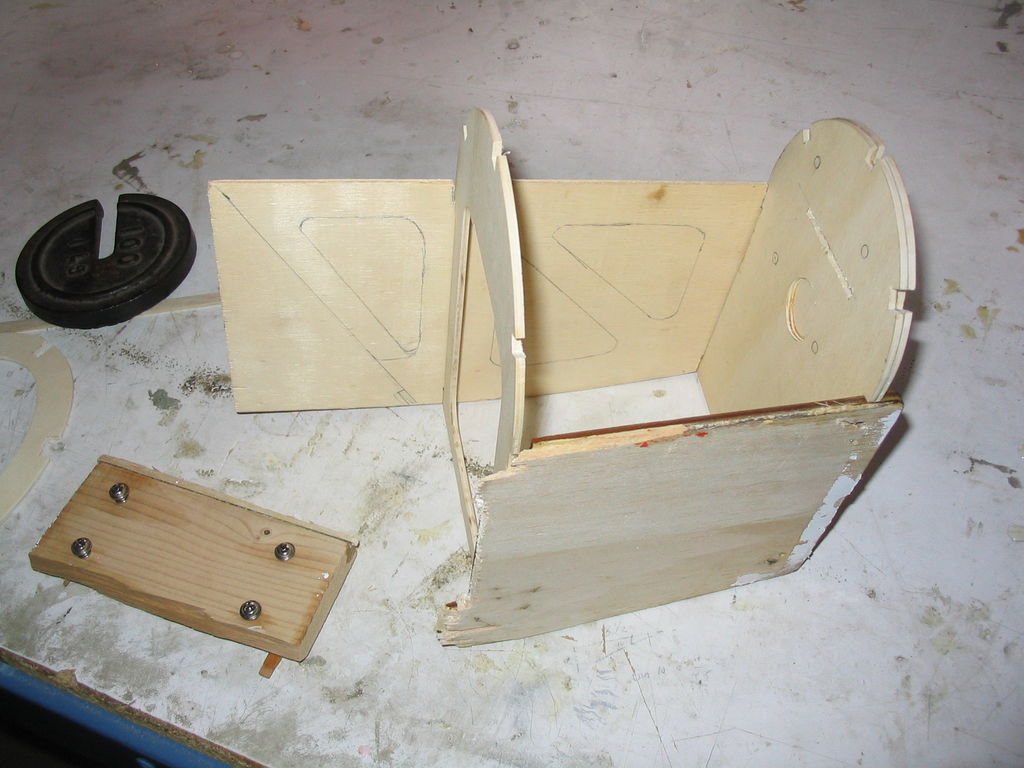
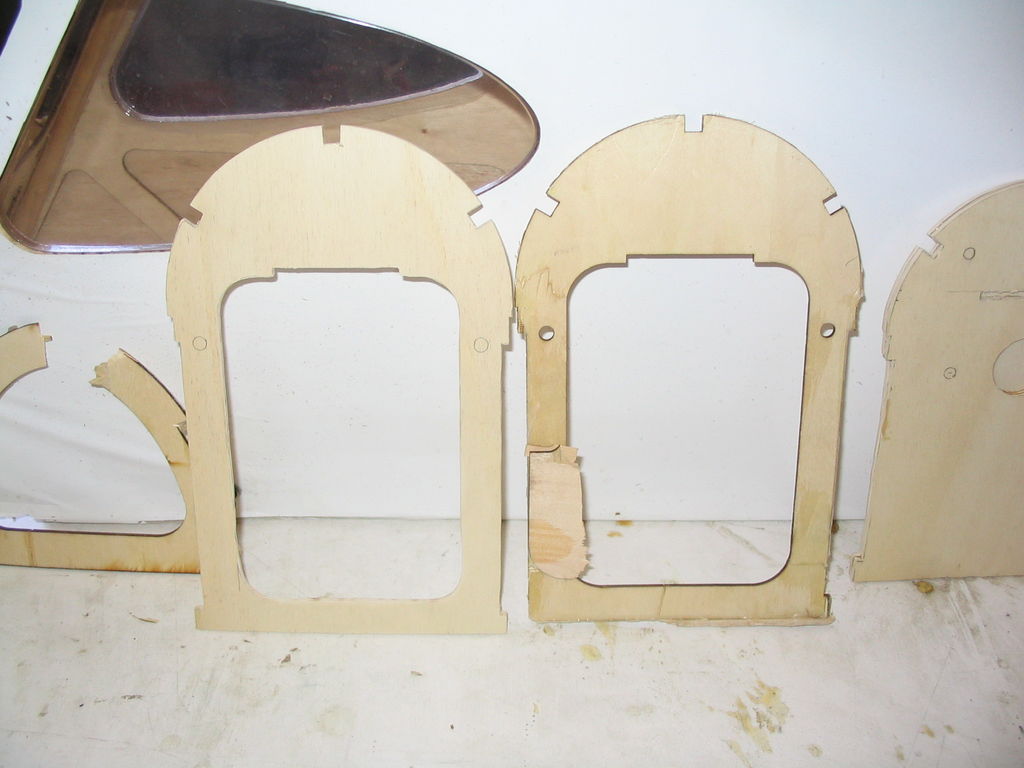
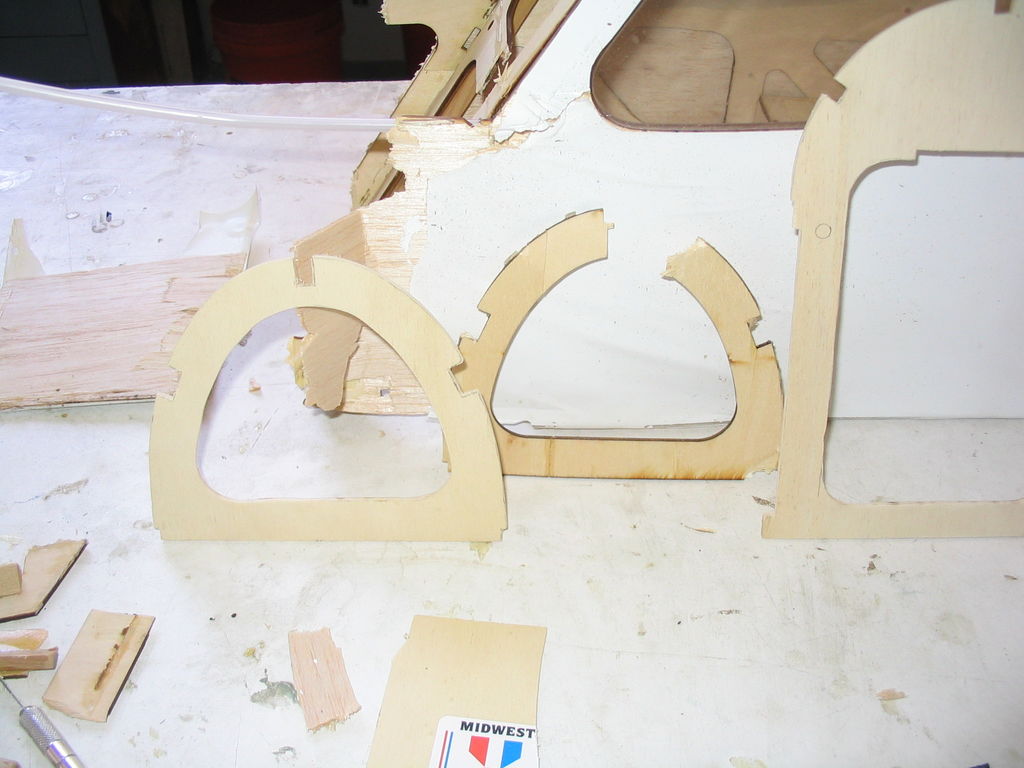
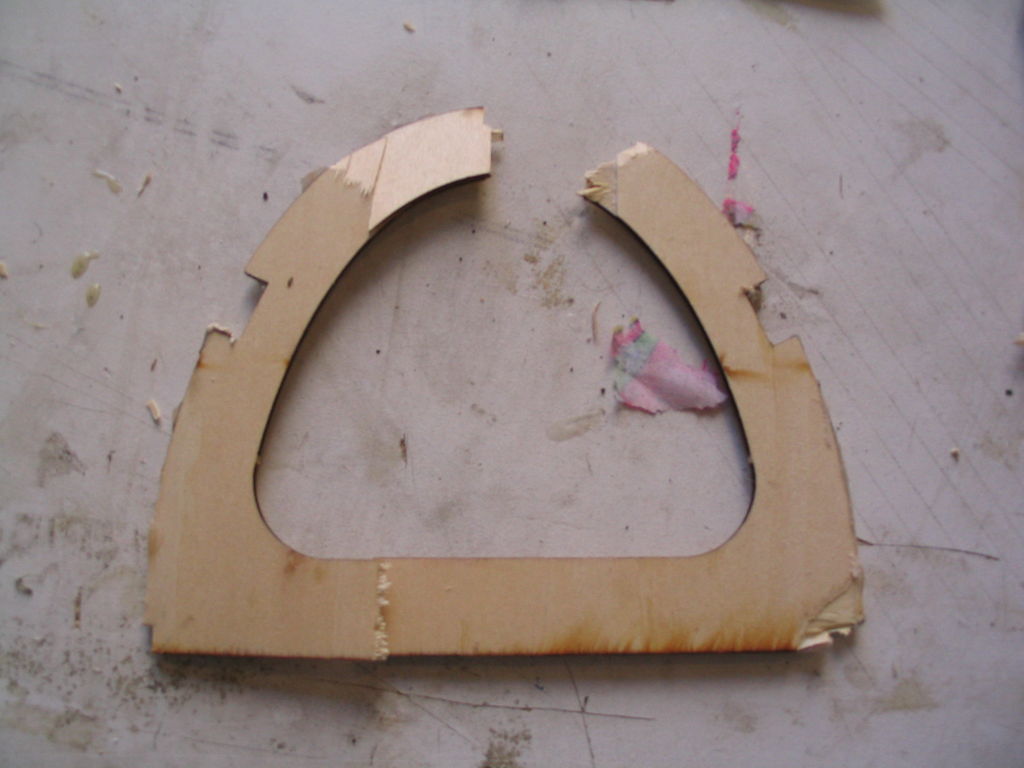
Today I made a replica of the fuselage bulk head that is between the cabin and the firewall. I also started tracing out the piece for the left side of the nose (which exploded in the crash.) It is important to get the size and shape just right so the firewall has the proper amount of right and down thrust. I think I’ve got it, but it’s something I have to be careful about. I’m not 100% sure yet how I will fit/splice the new piece into the old one, but once I figure out how to get the side pieces glued on in a structurally sound way, I’m home free for this rebuild I think.
The replacement firewall:
The replacement rear fuel compartment bulkhead:
The replacement “instrument panel”:
The replacement left side of the nose area:
May 26, 2006
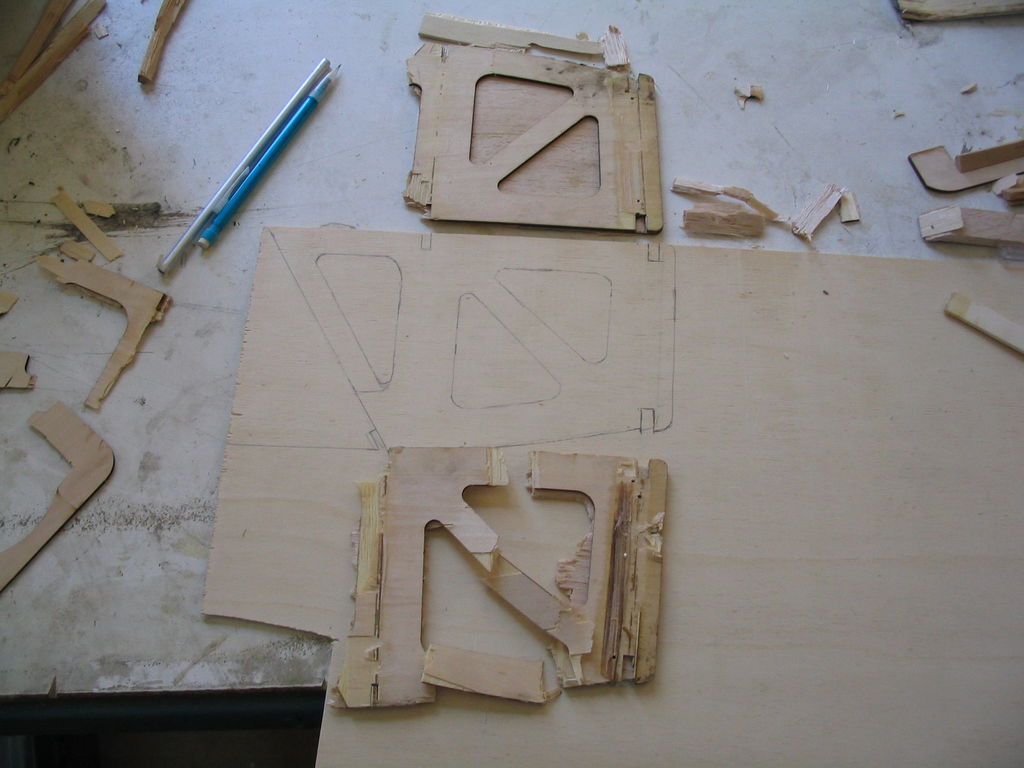
I pieced together the shattered bits of the original firewall and used that as a pattern to trace out a new firewall. The firewall is two layers of 1/8” light ply, so I made two copies, and sandwiched them together withepoxy.
My goal is to use the original bits as patterns to build new pieces when the original is just too shattered. There is still some thought that needs to go into how best to proceed in some areas, but I’m making progress.
May 19, 2006
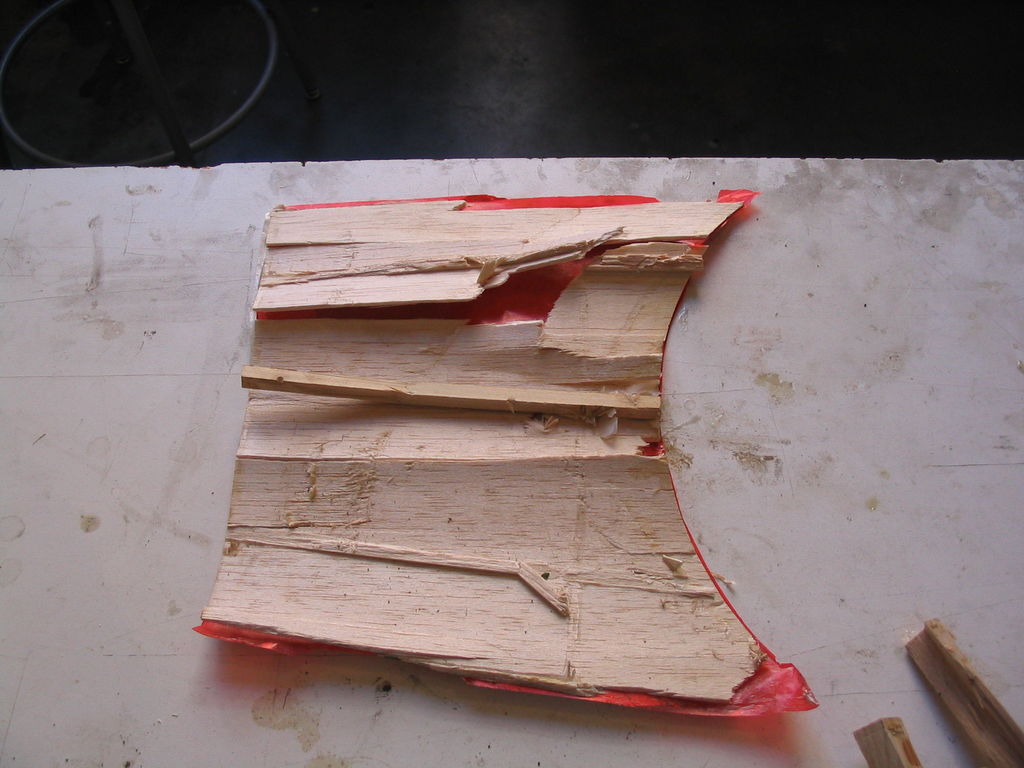
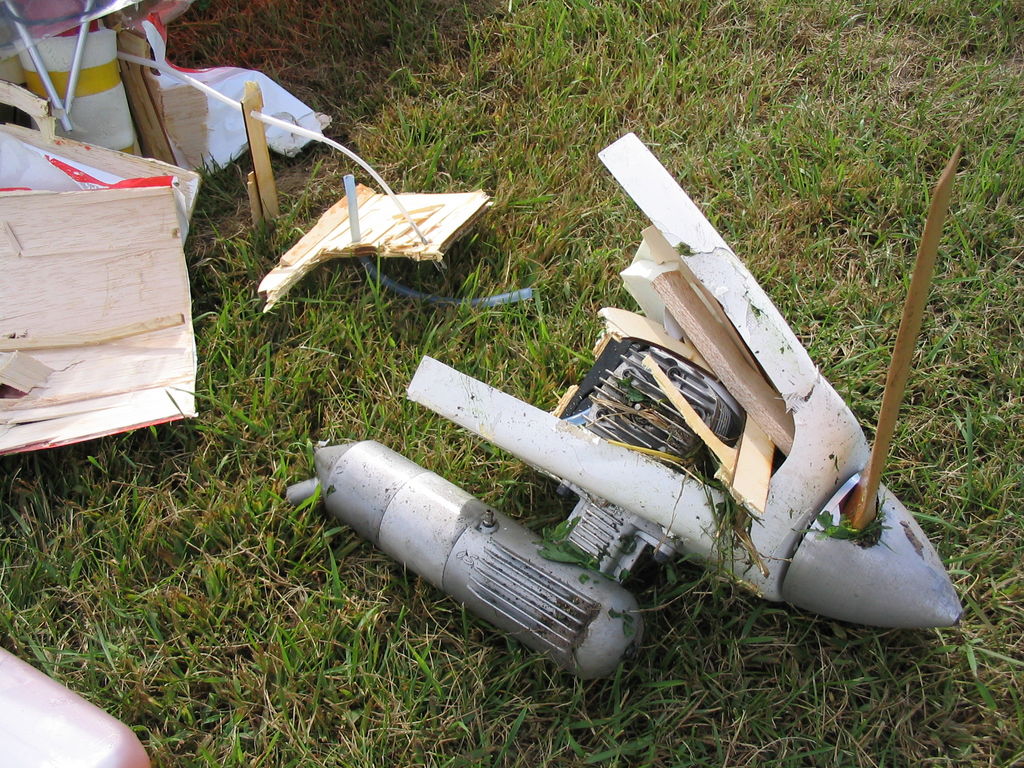
Happy birthday to me. 🙂 I spent the evening cleaning up the engine. The dirt was surface only, nothing even made it into the carb. The carb was slightly shielded by the cowl and the engine wasn’t running when it hit.There was a small amount of dirt/grit inside the veturi, so I popped offthe carb and blew everything out from the backside with carb cleaner. Hope that doesn’t attack the rubber gaskets (not to mention my fingers.) The aluminum spinner appeared to have no damage, the engine seemed to turn well,the motor mount was 100% intact. The only thing that shattered was the firewall. I’m going to have to build me another one of those.
May 17, 2006
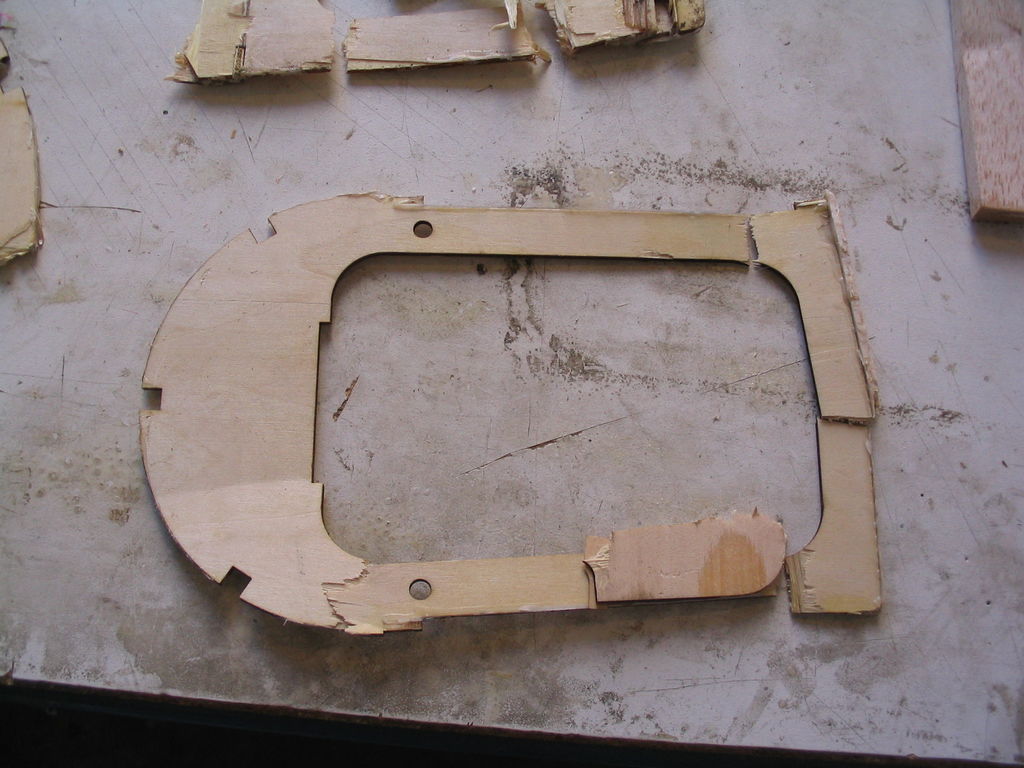
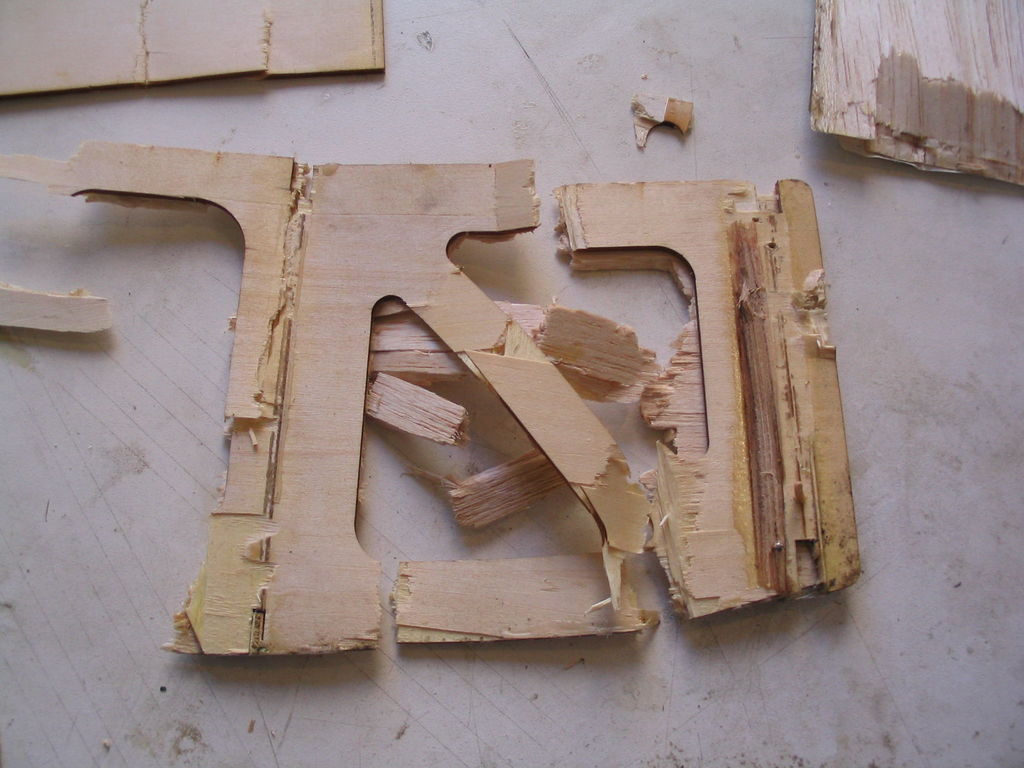
Some of the parts fit together, some don’t. Some pieces are just not there anymore.
May 16, 2006
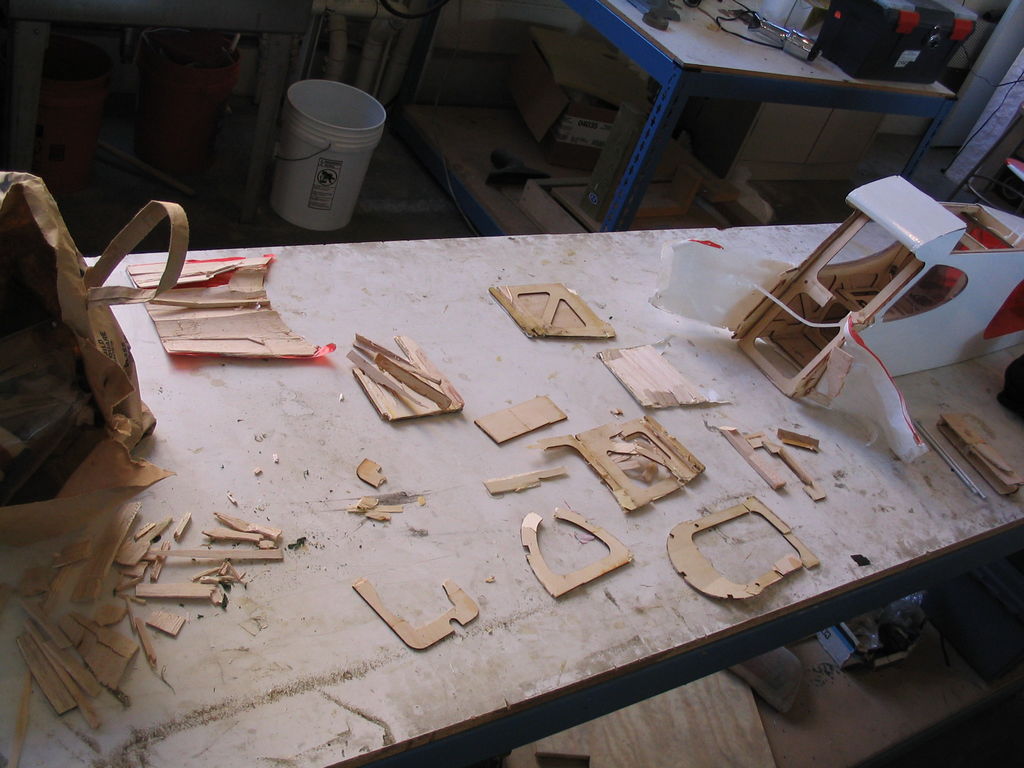
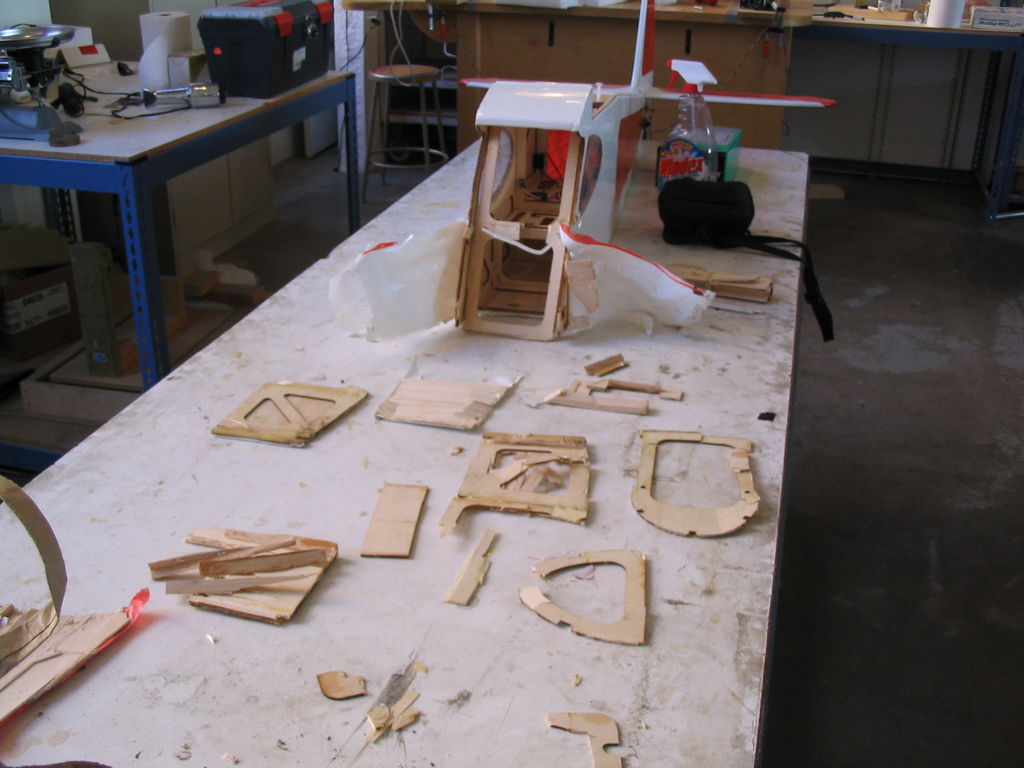
Today I started laying out the parts to try to piece them together. I madea lot of progress figuring out what goes where, but haven’t glued anything back together yet. Some pieces I can probably glue together and use, but some of the more load bearing structures I’ll glue together to make a formand then reproduce the part.
For what it’s worth, the left side of the front fuselage got compressed and exploded into bits. The right side of the forward fuselage is “reasonably” intact. This would indicate that the aircraft had some right lateral motion when it impacted the ground. That is the direction the tail swung around after impact and it was the right wing that ripped off.
After staring at the pieces for a few minutes today, I believe this Rascal can be rebuilt and will fly again, but it will take some effort. It won’tbe a completely trivial rebuild.
September 26, 2005.
Until further notice, Rascal #1 is offline. We are transfering all our instrumentation and cameras over to Rascal #2. There should be a Rascal #2 page on this site somewhere with all the most current “interesting” info on that aircraft.
September 21, 2005
Today we flew 3 very nice flights testing out a new patch antenna for our video system. The new antenna seemed to yield much better results thanwe were getting before. Plus we had determined that the ground transceiver for our radio modem link had also been interfering, so we put some good seperation between the radio modem transceiver and the wireless video receiver and that all worked much better.
The video was working well so the next thing we wanted to try was having me fly by video only (using a buddy box system and a safety pilot.) Take offs and landings would be done visually as per standard R/C procedures. The fly by video would only happen during a short segment of the flight.
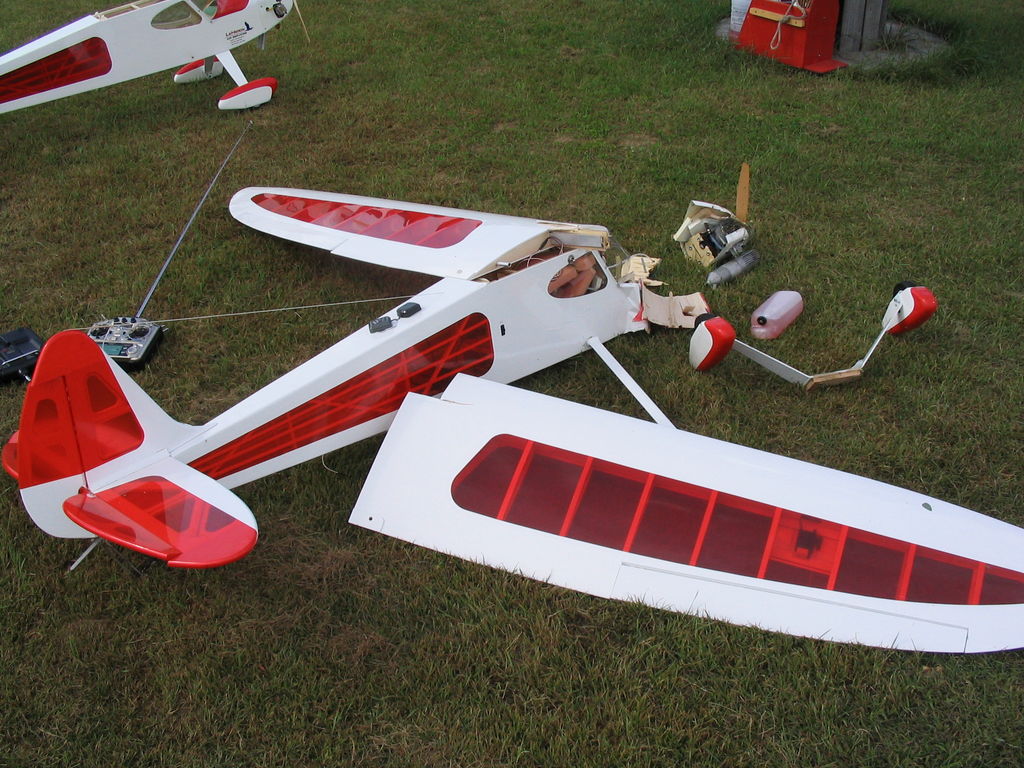
Shortly after take off (with maybe 75’ altitude) the engine sputtered and died. I thought I had plenty of altitude to turn back to the field so I initiated a turn. By my recollection I stayed off the elevator to avoid any chance of stalling, so the nose dropped substantially during the turn. However, once I got pointed down wind and tried to roll out of the turn (still with 20-30’ of altitude) the plane was unresponsive and dove straight in at a pretty sharp angle. As you can see there was substantial structural damage.
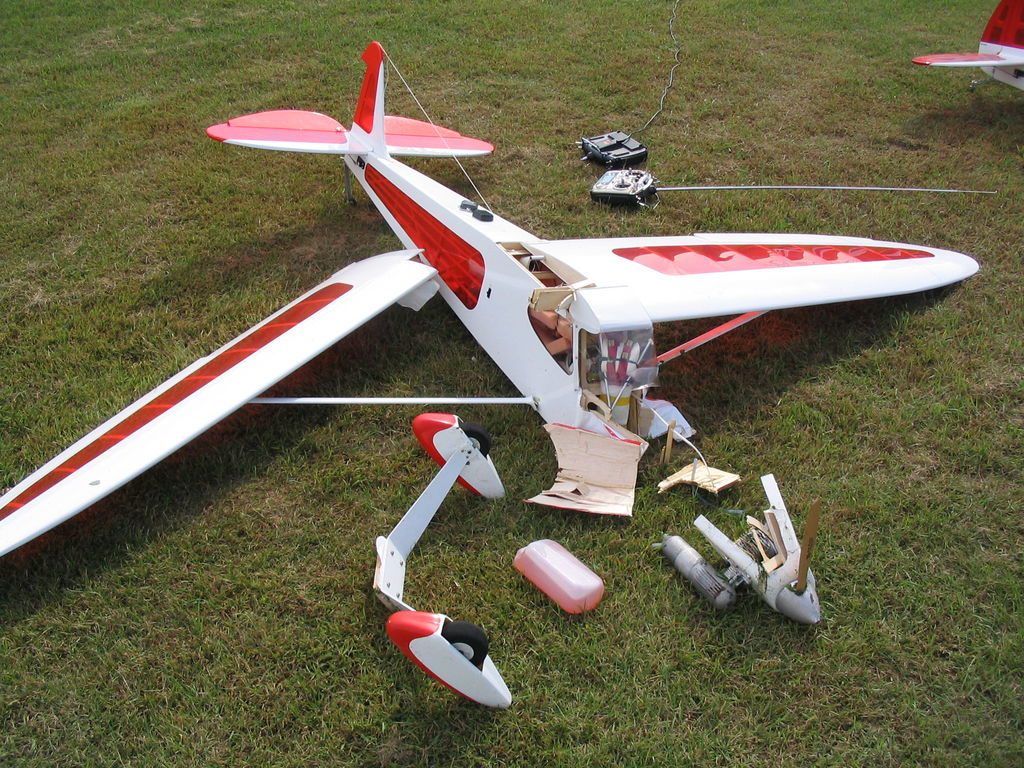
Case of dumb thumbs? Did I ride full elevator all the way into the ground? I didn’t think so at the time, but the consensus of the audience was that I stalled it in. But here is my thinking: 1. The Rascal is nearly impossible to stall, 2. I am aware of this issue and I thought I was intentionally staying off the elevator specifically to avoid this mistake, and 3. the plane seemed completely unresponsive in the final one or two seconds.
But I also don’t trust my recollection and I know my mind can play tricks with me. I am hoping we have good MIDG data from this fateful flight. I am hoping that I can compare the planes directional vector with it’s orientation to get an estimate of velocity and alpha. I don’t think I stalled it in, but I’m hoping the data can shed some light on what really happened. We don’t have a way to record control inputs or indicated airspeed, so we may never know for sure what happened. Just so I don’t forget, wind estimate for the time of the crash was 5 mph out of the south. The MIDG will give me speed relative to the earth, not speed relative to the local air mass.
Update (Sep 23, 2005):
- For some unexplained reason (and this has never happened to us before) our MIDG didn’t have a gps solution for the final flight. This means we had no position or velocity data, only attitude data.
- The attitude data clearly shows the take off, climb out, and turn back to the field.
- Our engine died during the climb out before the turn. But during the 180 turn back to the field, the nose immediately drops to between 10-15 degrees pitch down. This supports my intention to lay off the elevator during the entire turn so that gravity would keep the aircraft above a safe airspeed and eliminate the risk of stalling.
- Because of data buffering and the fact that when the main gear departed, it sheared off our radio modem antenna, I believe we lost the last second or two of data. Our wonderful video capture software automatically deleted the video for us because it detected too much snow (after the crash.)
Conclusion:
Note that I am speaking unofficially here, and from the perspective of the pilot in command with an ego to defend. Whatever the evidence,the conclusion will be that it was not my fault. 😛
I believe I properly executed my plan to turn back to the field withzero elevator input. The resulting natural dive during the turnshould have kept the airplane at safe flying speed since it naturallyseeks an equilibrium. This aircraft is very difficult to stall andin all previous stall tests, stalls were slow, required a tremendousamount of forced up elevator, they were gentle not sharp, and somelimited control authority was always preserved even during the stall.This makes it hard for me to believe that I could have been in a stallregime, and even if I was, I would have expected different behaviorfrom the aircraft. I believe I had sufficient and safe airspeed.However, when I tried to roll out of the turn and pull out of the diveI had nothing. The plane gave no response and continued to divestraight into the ground.
My conclusion then is that given my recollection of the control inputsand my intentions (supported by the attitude data) combined with myunderstanding of aerodynamics and my specific knowledge of theparticular flight characteristics of this aircraft, I believe theaircraft maintained safe airspeed throughout the 180 turn backmanuever, and very likely I over compensated and gained more airspeedthan needed through the turn/dive. Based on my understanding of thespecific characteristics of this plane, I find it highly unlikely thatI was any where close to the stall regime. The more likely scenariois the relative orientation of the plane’s R/C receiver antenna to theground transmitter, combined with the interference patterns of the twoon-board transmitters (1 for video and 1 for data) put us in atemporary “dead” zone. Unfortunately our close proximity to theground when this occured meant that we were unable to fly through thedead zone and recover … we hit the ground first.
I think I can rule out pilot error in the direct operation of theaircraft, however there are still higher level issues we have controlover that likely contributed to the crash. Specifically engine tuningprior to the flight. We did run up the engine on the ground beforetake off and it sounded perfect, but perhaps we missed something.Also we were using a buddy box system for the first time on thisflight. Did that contribute in any way? Crashes seem to always be along sequence of events where the initial problem leads to, but is notthe source of the final crash. What else could we have done prior tothe flight, with the setup of the airplane, the setup of the buddy boxsystem, the setup of our instrumentation, our flight plan, etc. tohave prevented this crash? Are there things we can do to ensure morereliable engine operation?
This big Rascal can be rebuilt and will fly again.