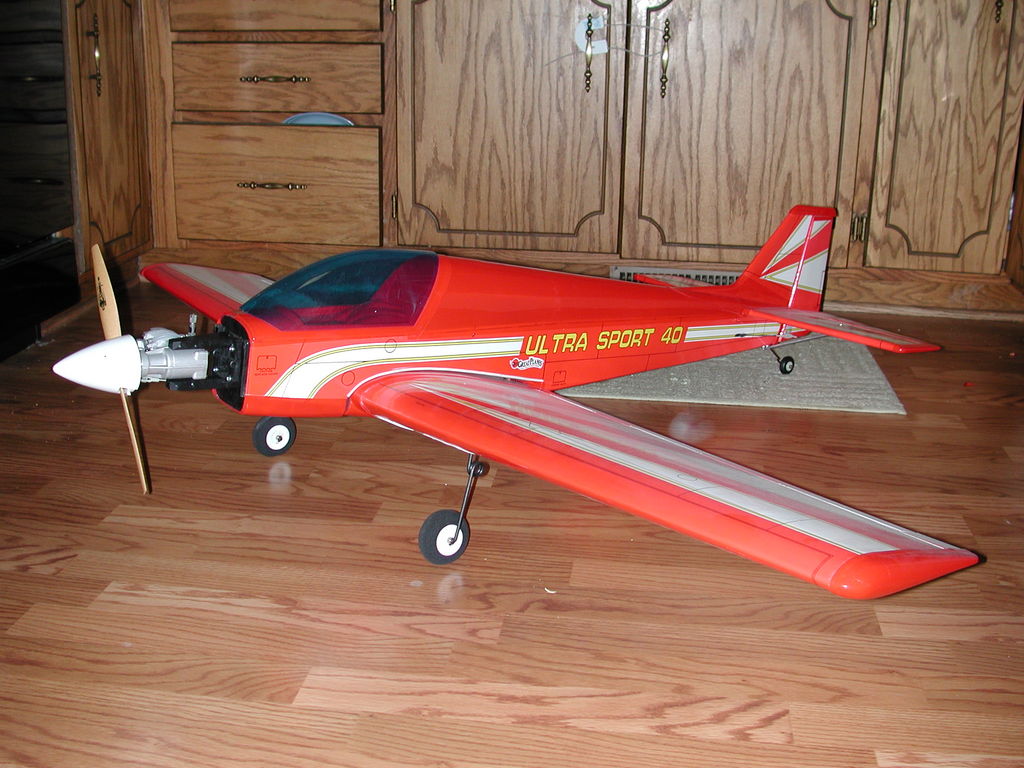
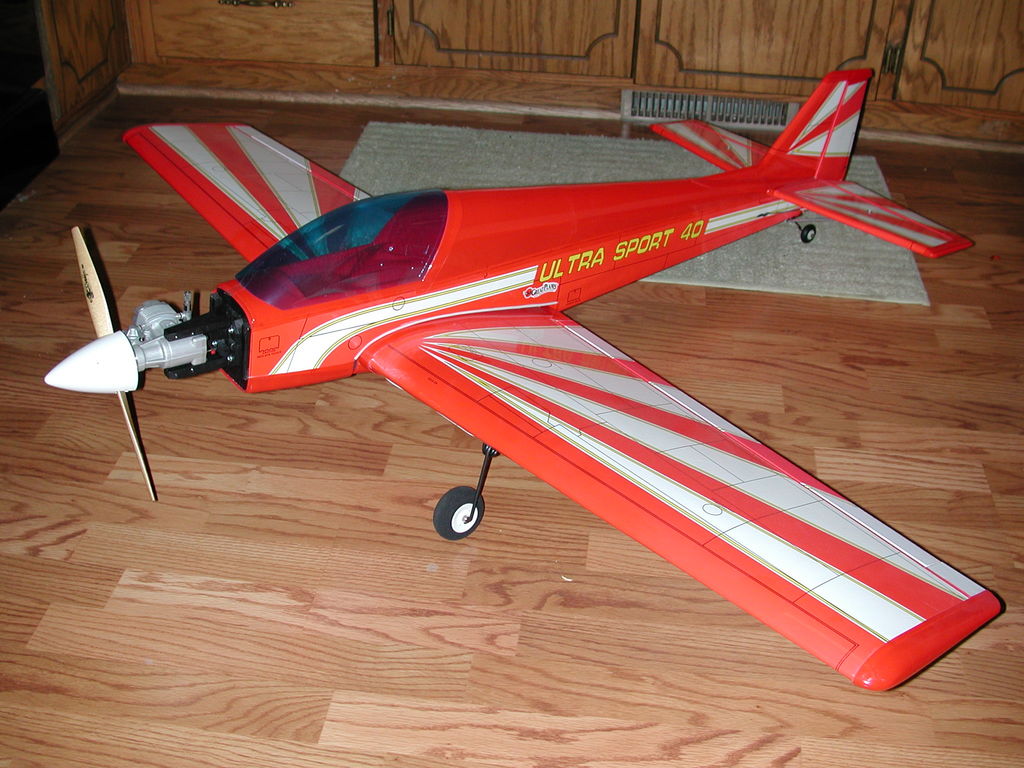
Ultra Sport 40 Assembly
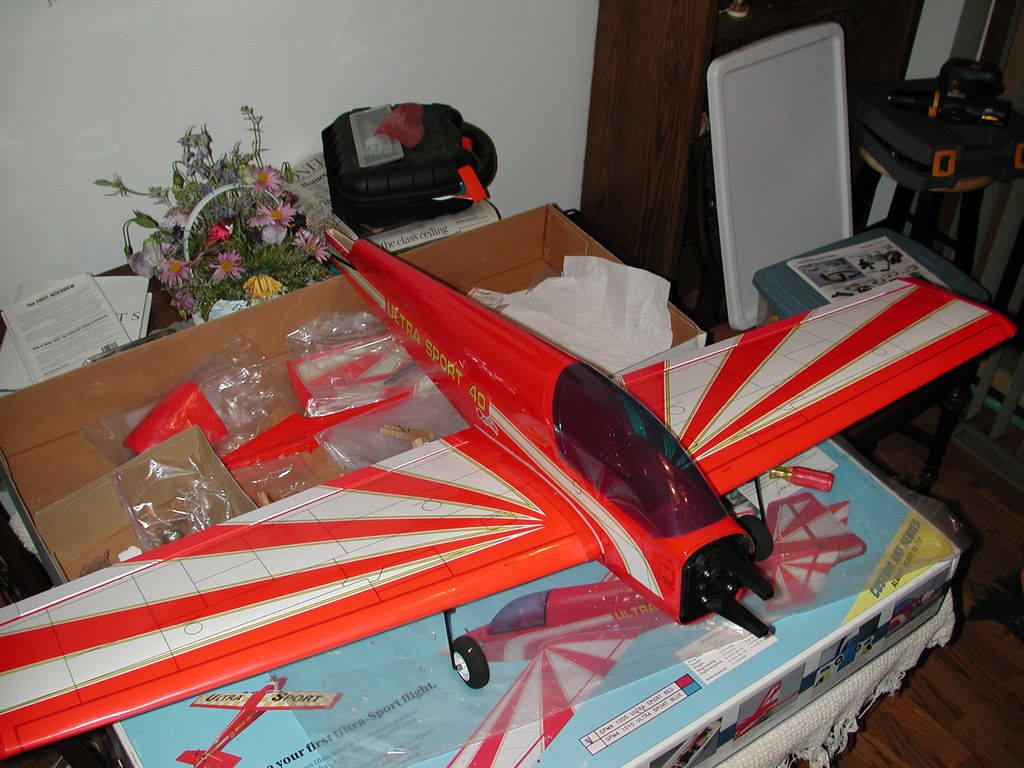
Great Planes Ultra Sport 40 ARF (Red)
Initial Comments
This was my b-day present for May, 2002. My super sportster 60 construction project has been mostly stalled so I thought I’d see how things fared with an ARF. By the time my Super Sportster is ready to fly, I’ll have a large time/emotional investment in it so I would like to have some low wing tail dragger time in the log books before I actually try to fly the Super Sportster 60.
The skin of this aircraft is interesting. Typically, kit construction has you building up some sort of frame and then sheeting over the top of some or all of the structure with thin balsa sheets and finally covering with a thin plastic heat shrink film. This ARF takes a different approach. Instead of balsa sheeting they have a thicker layer of covering that is made of some dense foam laminated with a thin plastic external layer. This plastic/foam sheet wraps around the underlying structure (which can be rough cut because it doesn’t show through the foam layer) and has “cool” designs printed directly on it, so there is no need for painting or decals. All in all it’s about 1/8″ to 3/32″ thick or so and structurally significant. The wing for instance is built up with standard wing ribs and stringers, but then wrapped with this foam/plastic composite instead of sheeting with balsa. The advantages I see are that it is light, probably cheap, and you can directly print your cool color scheme to it. The disadvatage is that if you ever ding it up significantly, I’m not sure how it could be repaired. There are a lot of plastic pieces on this plane in addition to the plastic/foam sheet covering. If you crashed and did any kind of substantial damage to this airplane, I think you’d have to toss the whole thing. Especially since it is discontinued so you probably can’t find replacement parts for it.
Assembly
I’ve just begun construction so I’ll share some thoughts and photos as I go. I don’t have a separate work shop so my work area is very tiny and shared with the rest of the family. My apologies for the clutter in these pictures. 🙂
This is my first ARF. Generally construction is straightforward. Things always take longer than you hope/plan/expect, but the sorts of things you need to do with an arf, you would have to do anyway with a kit, and the arf saves you building up the major structures.
Things don’t always fit together perfectly, so expect to shave a bit off here and there and do a good amount of sanding. The box says sanding is not needed, but the instruction manaul correctly says otherwise. I have a power sander I bought for a house project which actually works very well for the various sanding chores. Even with ample sanding, it’s hard to get everything to go together just perfect. Oh well, hopefully it will be good enough, and I’ll just slop a little extra epoxy in the cracks. My assumption is that with no extra sanding (as per the claims on the box) I would get a functional and safe plane, and any tiny discrepancies may affect looks and perhaps subtly affect tracking through the sky, but I don’t think it should be a safety issue.
Wing
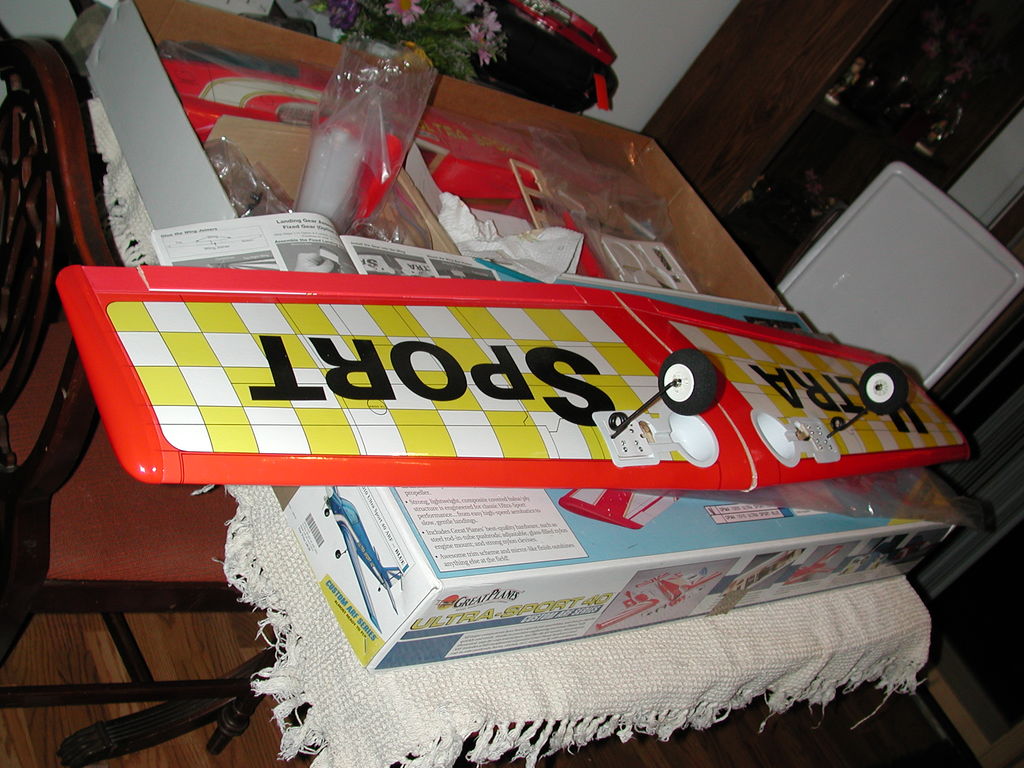
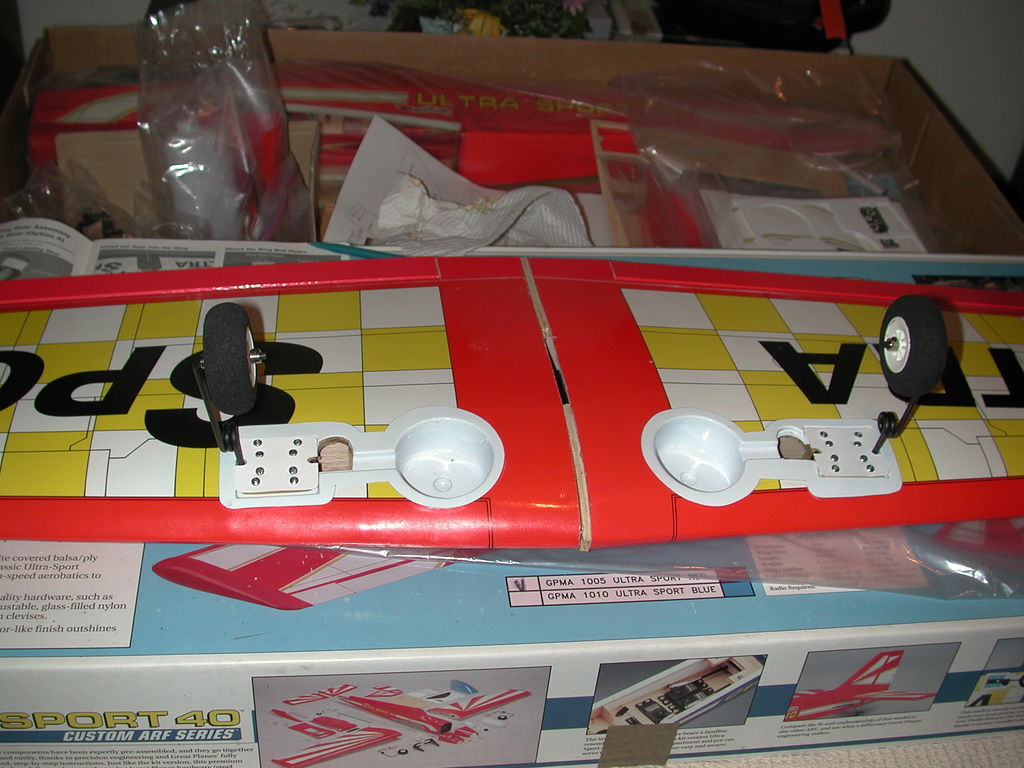
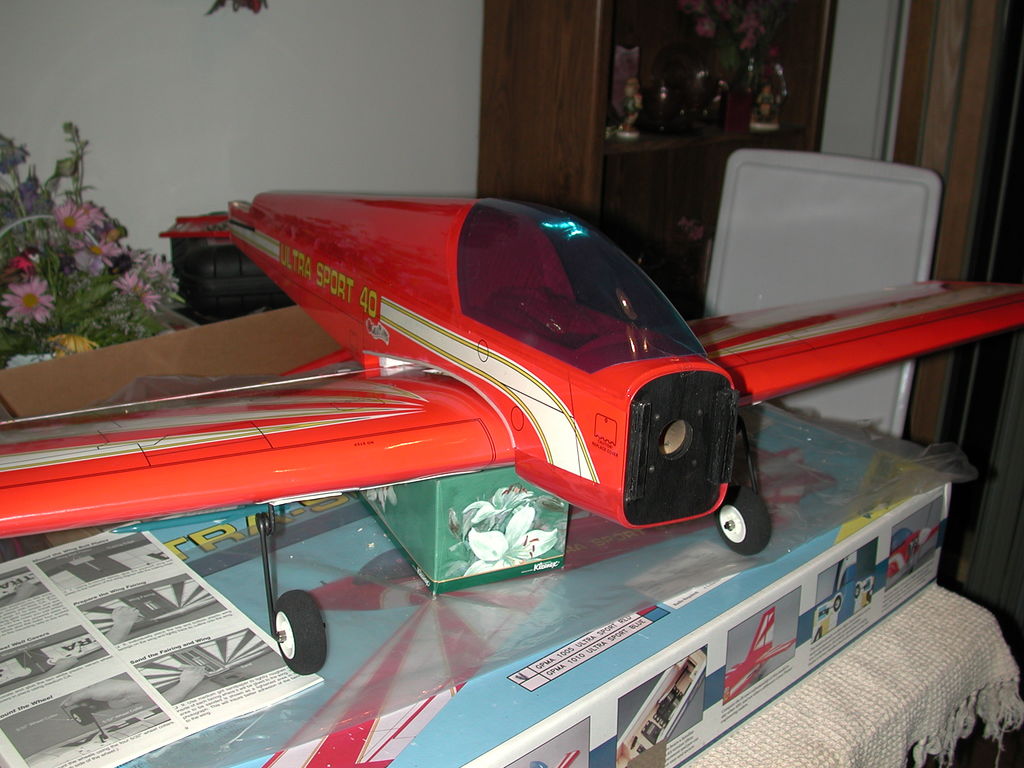
05/20/2002 – Here are pictures of the wings. The two halves are joined and the landing gear is installed. I’m sure this hotrod will fly as fast as I need it to go, so I opted for the simpler, fixed gear installation.
wing1
wing2 05/20/2002 – Just for fun I placed the fuselage on top of the wing to see how things are shaping up:
test-fit1
test-fit2 05/22/2002 – I glued in the wheel well covers and the top and bottom wing fairings, as well as the front dowl (for securing the front of the wing) and some foam to seal the exhaust residue out. The wing is almost done with the exception of installing the aileron servo and lincages.
05/23/2002 – Doh!!! First major setback. Once the wing is assembled, you need to mount it to the fuselage. This ARF uses a single dowl in the front of the wing and two nylon bolts in the back. The dowl is installed in the front, center of the wing during wing assembly and the corresponding hole comes predrilled in the fuselage. The problem is that it doesn’t fit right. (Or at least my resulting wing didn’t fit right.) The wing chord is too long, or the dowl mounting hole is too high, or a combination of both. The fuselage has major structural bulkheads on the wing front and back, so the fuselage opening can’t easily be made bigger. So I carefully sliced open the plastic wing fairing in the back of the wing and started hacking away balsa and plywood from the trailing edge. I also got out my knife and worked on lowering the front dowl hole a bit. I probably need to close off the top of the hole with some sort of filler so there isn’t any opportunity for movement of the dowl. However, the wing is already so tight against the saddle in the fuselage that I doubt that could ever happen. I don’t know what this is going to do to the wing incidence, but I suppose I should check/measure before I fly the thing. (Update: I never got back to checking the wing incidence, but she flies pretty great as constructed.)
05/24/2002 – I finished installing the aileron servo and lincages and did a bit more carving to get the wing to fit better. I think the wing is pretty much done. The powerplant hasen’t arrived yet, so I’ll just skip working on that end of the fuselage until it comes. Next up is the wing mount.
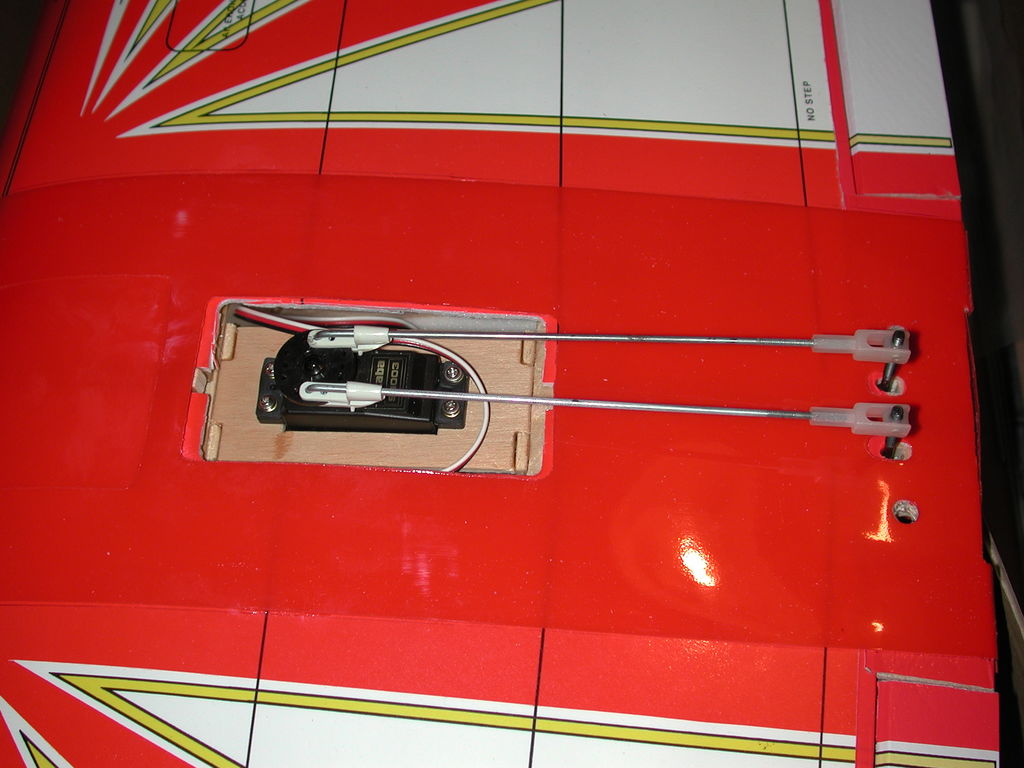
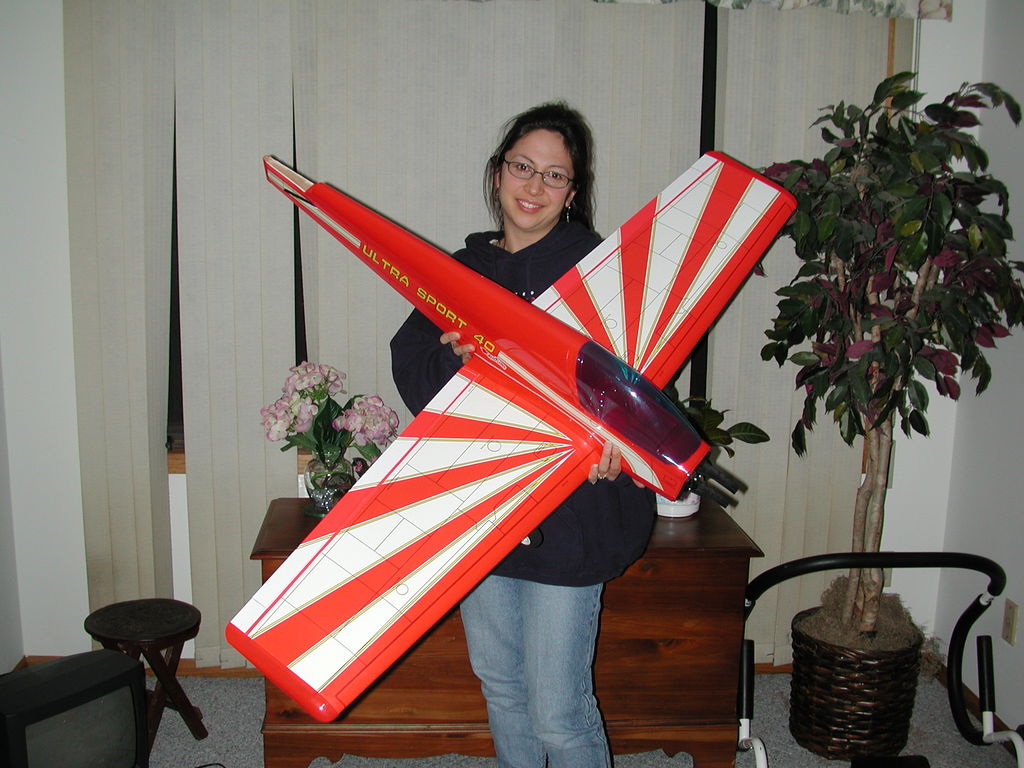
aileron-servo 05/25/2002 – Finished the wing mounting. I was a little nervous about the two main wing mounting bolts. I tend to have a hard time drilling holes that line up when I’m done, but in this case I followed the technique outlined in the manual and everything worked great. Next up are the horizontal and vertical stabalizers.
ruth1
boss
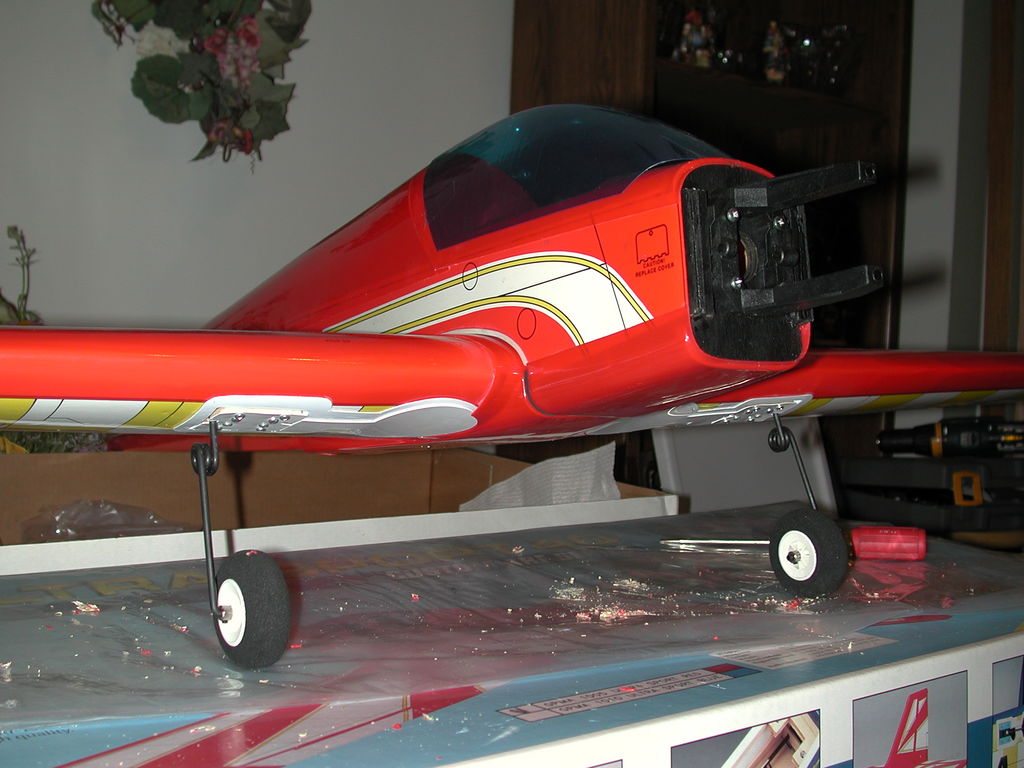
wing-mounted
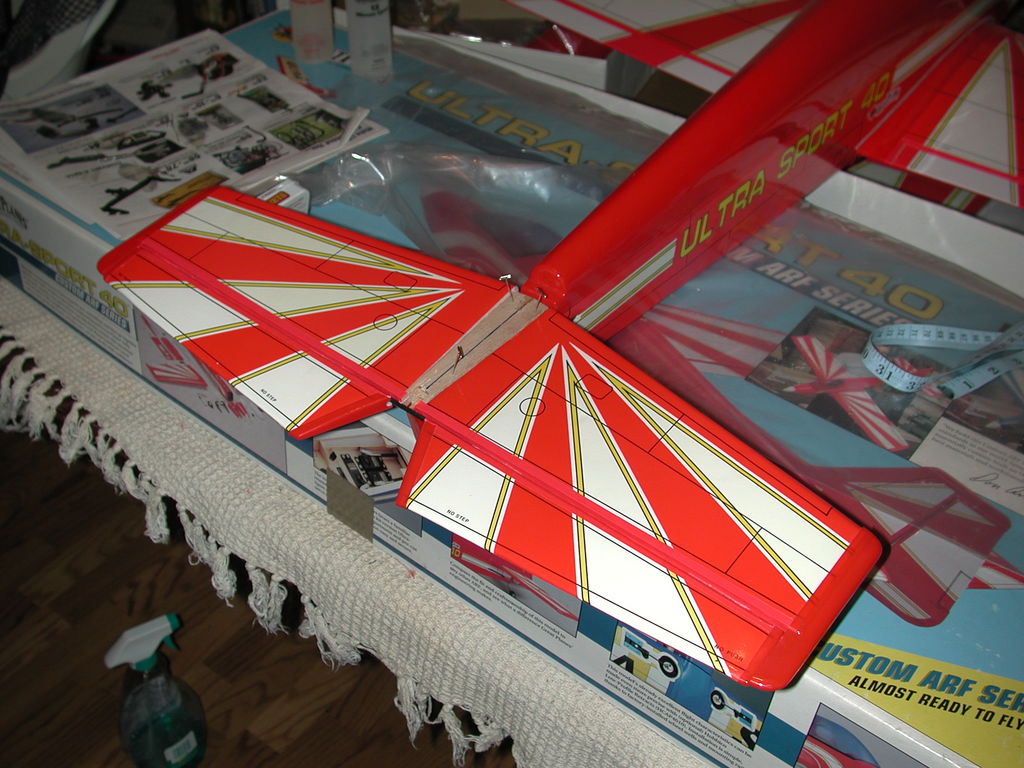
Tail
05/27/2002 – Working on mounting the horizontal and vertical stabs. I followed the instructions and things seem to be progressing in a straightforward manner. The structure is pretty chinsey/weak back there though. I can see why they add two aluminum brackets to reinforce the horizontal stablizer. And then the plastic fairing around the base of the vertical stab also is a significant structural component. It makes me a little nervous, especially compared to other kit’s I’ve built, but I’m proceeding with faith in the instructions. This will be a very sharp looking aircraft, but not one you want to bang up. It has very light weight construction. (Update: after putting the tail together completely, it came out very sturdy. The braces make a big difference. All in all, this is as solid as any other kit I’ve built.)
horiz-stab1

horiz-stab2
vertical-stab In this next image I have the rudder and the vertical stab fairing positioned, but not glued. Next up is the tail wheel.
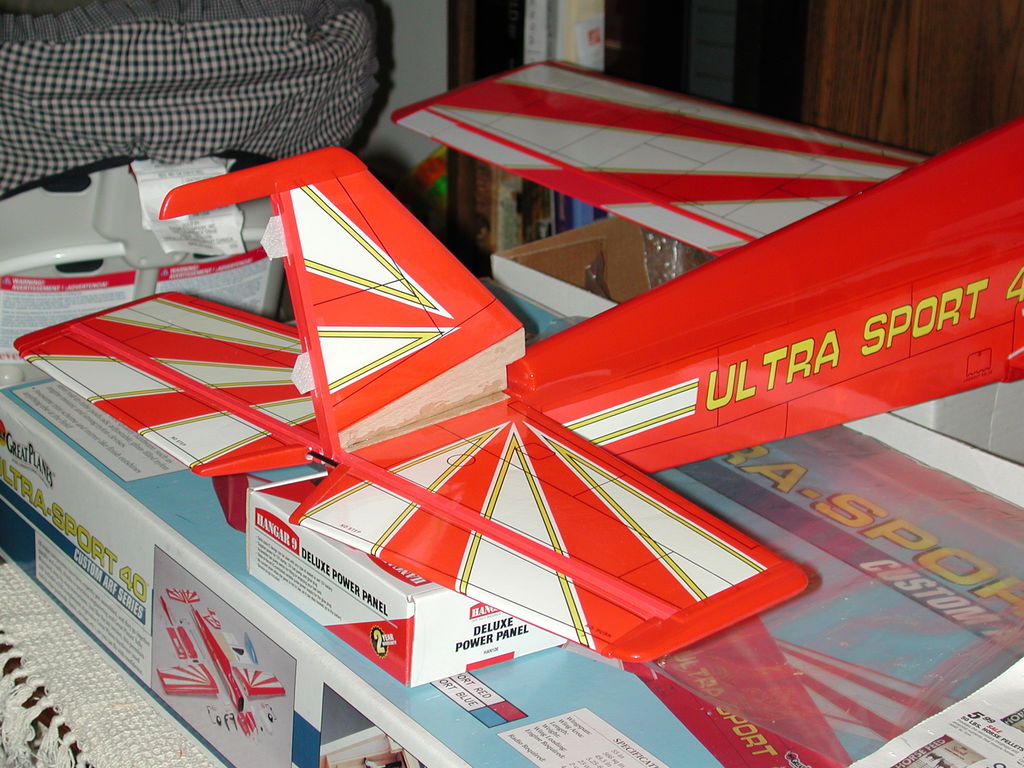
tail 05/28/2002 – Except for the control lincages, I finished up the tail. This involved gluing on the fairing for the vertical stabalizer. This fairing is a major structural component so it needs to fit and be glued securely. However the instructions were careful to point out that the horizontal and vertical stabs needed to be slid back far enough so that the rudder line is flush from the back of the fuselage to the back of the vertical stab. This unfortunately meant that the vertical stab fairing wouldn’t fit correctly. I hacked on it and chopped off a bit from the back until it would fit flush along the sides and the front. This means it isn’t quite as pretty, but it should serve it’s structural duties just fine. (Update: once everything is together, this blemish is almost impossible to notice.)
I then proceeded to install the tail wheel and rudder.
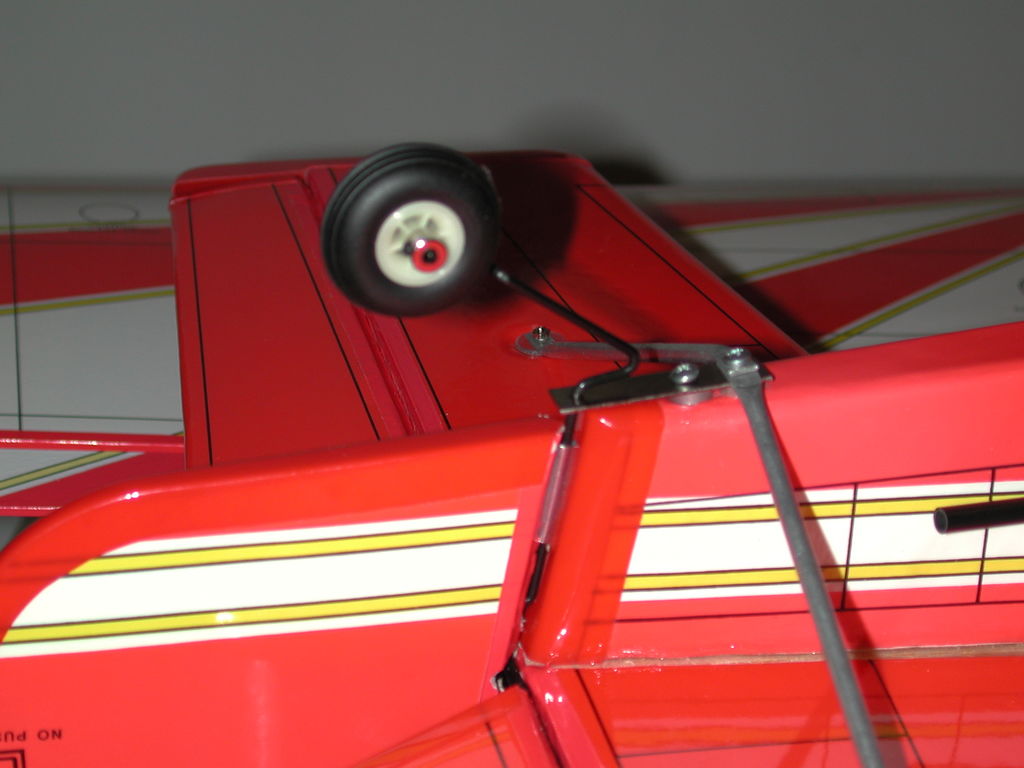
tail-wheel Then I proceeded to install the horizontal stabalizer braces. These actually add a lot of support and structure.
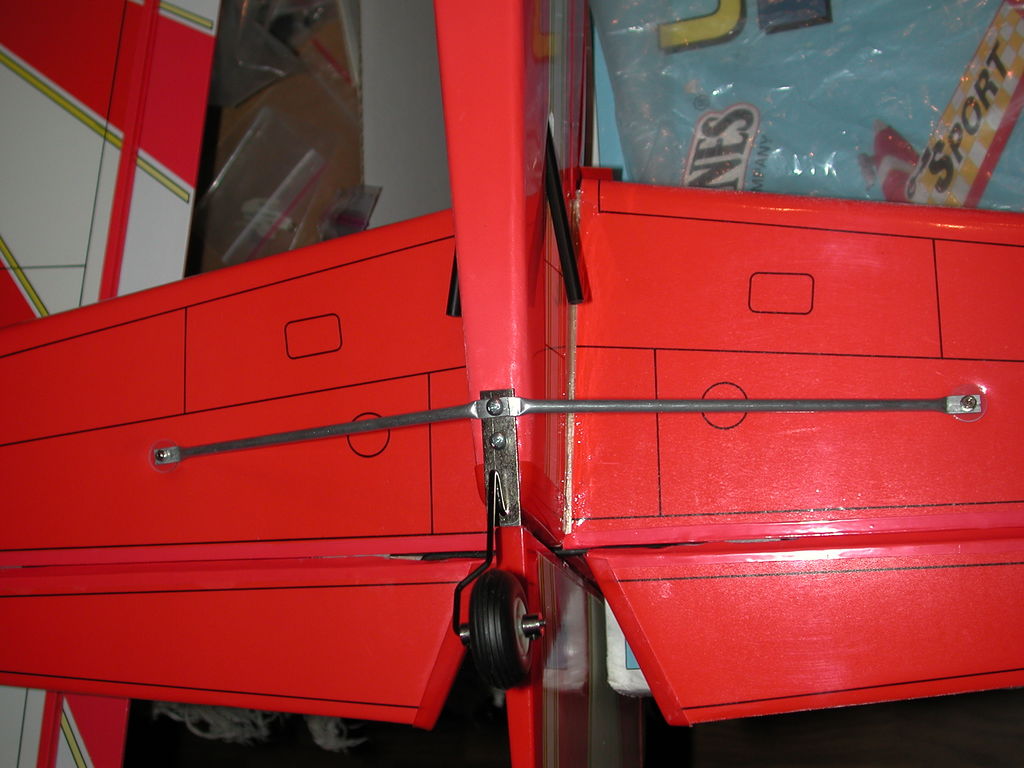
tail-brace
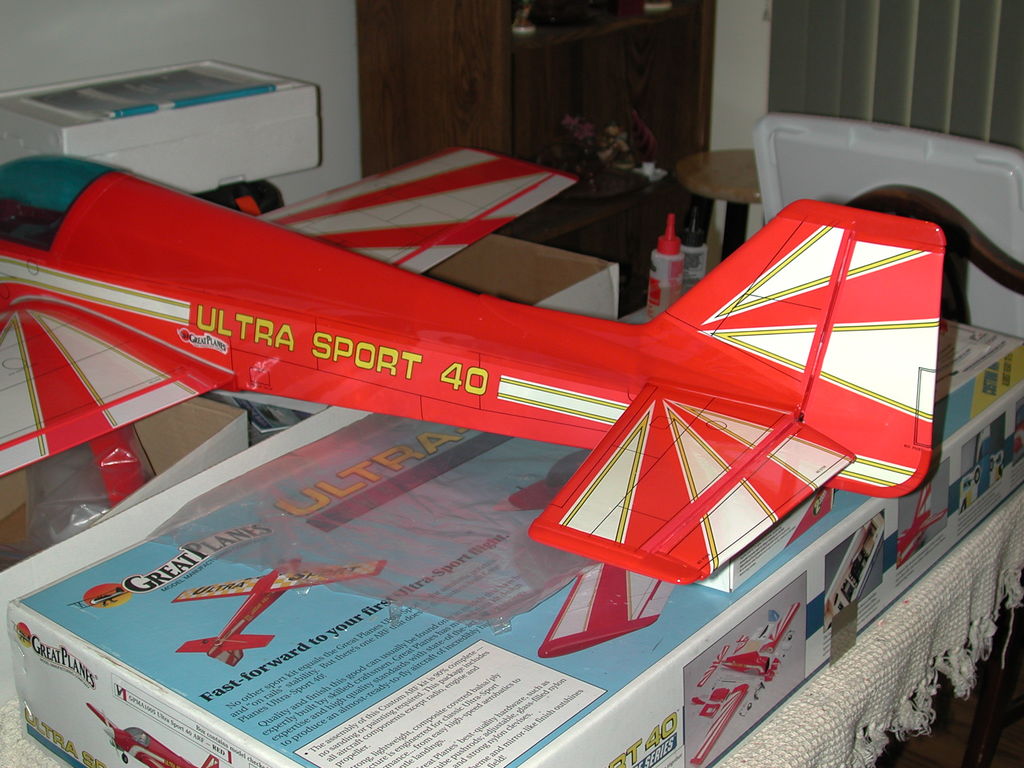
Finishing up …
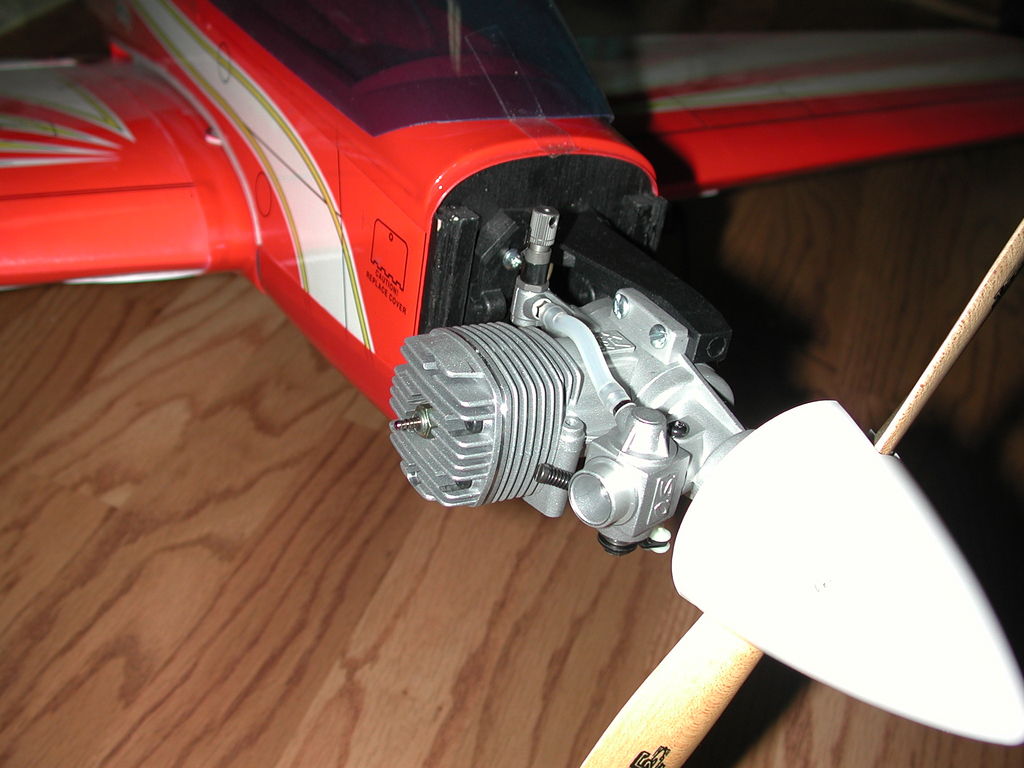
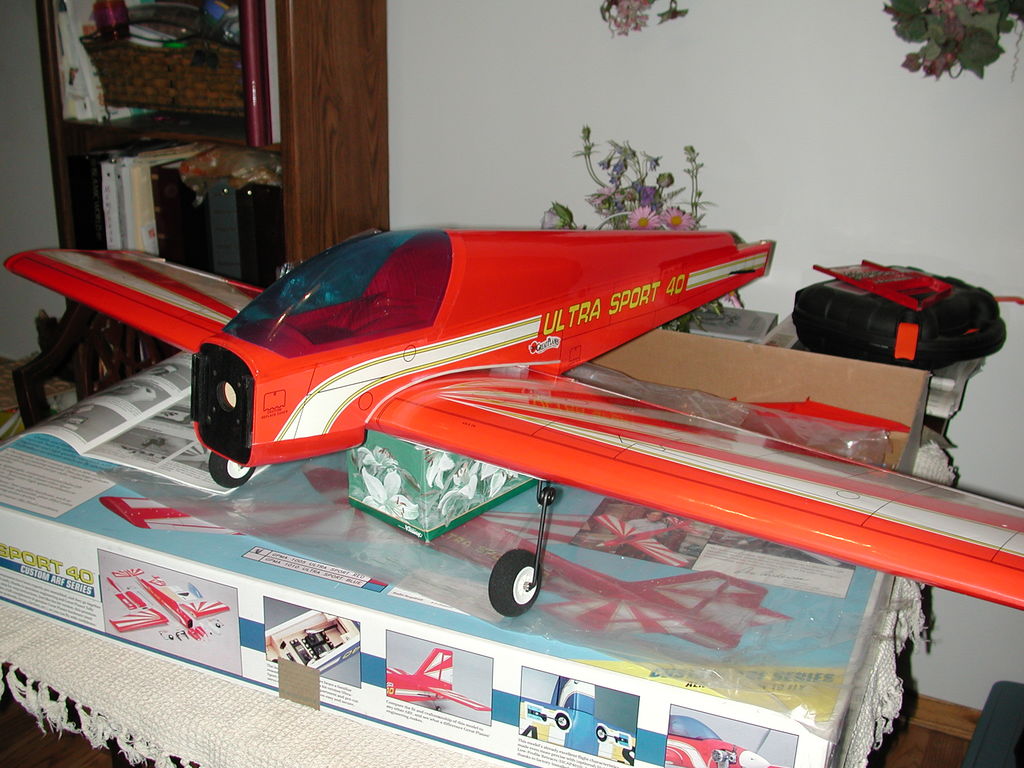
04/30/2003 – Ok, finally, I made some time to do a bit more work. I’m so close, I just need to push through and get it done. Recently I’ve installed the control lincages, installed the fuel tank, and installed the engine. The two major remaining items are to install the cowl and the canopy. I might do the initial flights with the cowl off? That OS .46 Max sure swings a big looking prop … 🙂
almost-1
almost-2
almost-3