Howto: Action Cam HUD overlay
In this post I share my process and tools for creating HUD overlays on a flight video. Here is a quick overview of the process: (1) Calibrate your camera, (2) Extract the roll rate information from the flight video, (3) Automatically and perfectly time correlate the video with the flight data, (4) Render a new video with the HUD overlay.
Source Code
Please be aware that this code has not yet gone through a v1.0 release process or outside review, so you are likely to run into missing python packages or other unanticipated issues. I hope that a few brave souls will plow through this for themselves and help me resolve poor documentation or gaps in the package requirements. All the code is open-source (MIT license) and available here:
https://github.com/UASLab/ImageAnalysis
Camera Calibration
Let’s jump right into it. The very first thing that needs to be done is calibrate your specific camera. This might sound difficult and mysterious, but have no fear, there is a script for everything! Every camera (especially cheaper action cameras) has unique lens imperfections. It is best to do your own calibration for each of your cameras rather than trying save some time and copy someone else’s configuration.
The camera calibration process involves feeding several images of a checkerboard calibration pattern to a calibration script. Each image is analyzed to locate the checkerboard pattern. This information is then passed to a solver that will find your camera’s specific calibration matrix and lens distortion parameters.
To make this process easier, the calibration script expects a short 1-2 minute movie. It processes each frame of the movie, locates the checkboard pattern and stashes that information away. After all frames are processed, the script samples ‘n’ frames from the movie (where ‘n’ is a number around 100-200) and uses those frames to solve for your camera’s calibration. The reason that all frames are not used is because when ‘n’ starts pushing 250-300+, the solver begins to take a long time where long is measured in hours not minutes.
Here is a sample calibration video. The goal is to always keep the checkerboard pattern fully in view while moving it around, closer, further, to different parts of the frame, and from different offset angles. It is also important to hold the camera steady and move it slowly to avoid the effects of blurring and rolling shutter.
Now save your movie to your computer and run:
calibrate_movie.py --movie <name>
The script will run for quite some time (be patient!) but will eventually spit out a camera calibration matrix and set of lens distortion parameters. Save these somewhere (copy/paste is your friend.)
Extract the Roll Rate Information from the Flight Video
First take the camera calibration and distortion parameters derived in step one, and copy them into the gyro rate estimation script.
Next, run the script. This script will detect features in each frame, match the found features with the previous frame, and compute the amount of rotation and translation from each frame to the next. (It also is a hacky image stabilization toy).
1-est-gyro-rates.py --scale 0.4 --movie <name> --no-equalize
Here is an example of the script running and detecting features. Notice that a very significant portion of the frame is covered by the aircraft nose and the prop covers most of the remaining area. That’s ok! The gyro estimation is still good enough to find the correlation with the flight data.
Correlate the Video with the Flight Data
The next script actually performs both of the last two steps (correlation and rendering.)
2-gen-hud-overlay.py --movie <name> --aura-dir <flight data dir> --resample-hz 30 --scale 0.45
The script loads the flight data log and the movie data log (created by the previous script). It resamples them both at a common fixed rate (30hz in the above example.) Then it computes the best correlation (or time offset) between the two.
Here is a plot of the roll rate estimate from the video overlaid with the actual roll gyro. You can see there are many differences, but the overall trend and pattern leads to only one possible correct time correlation.
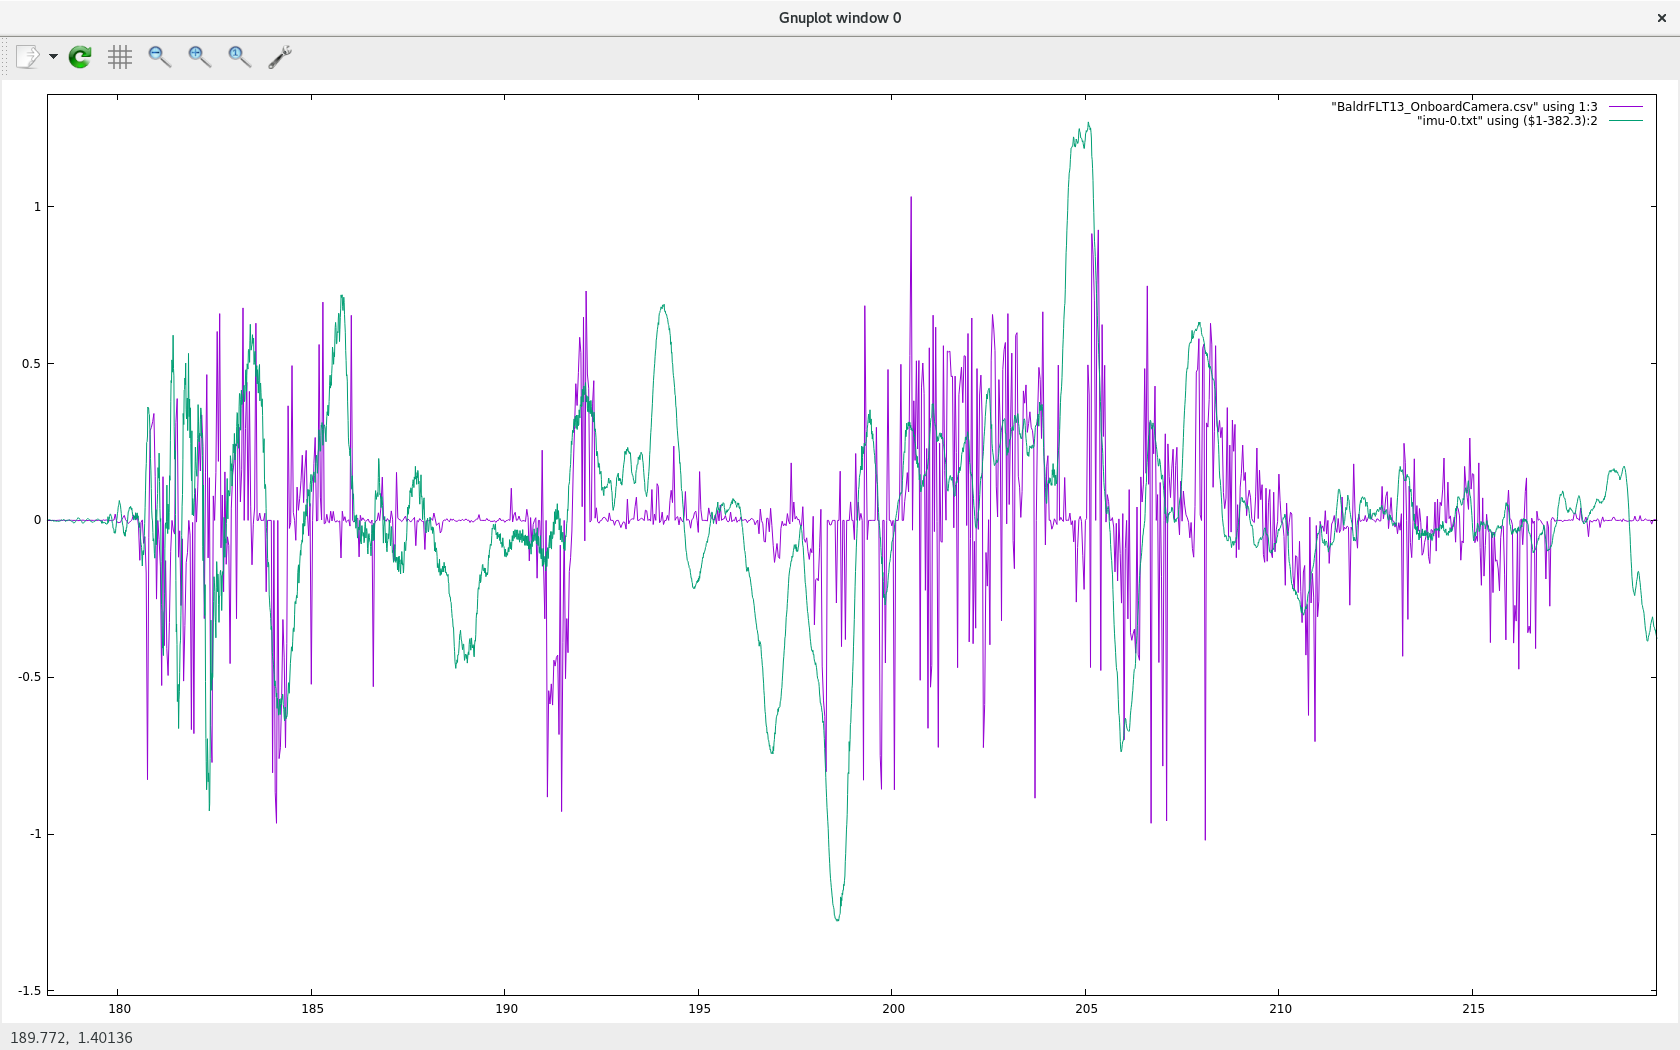
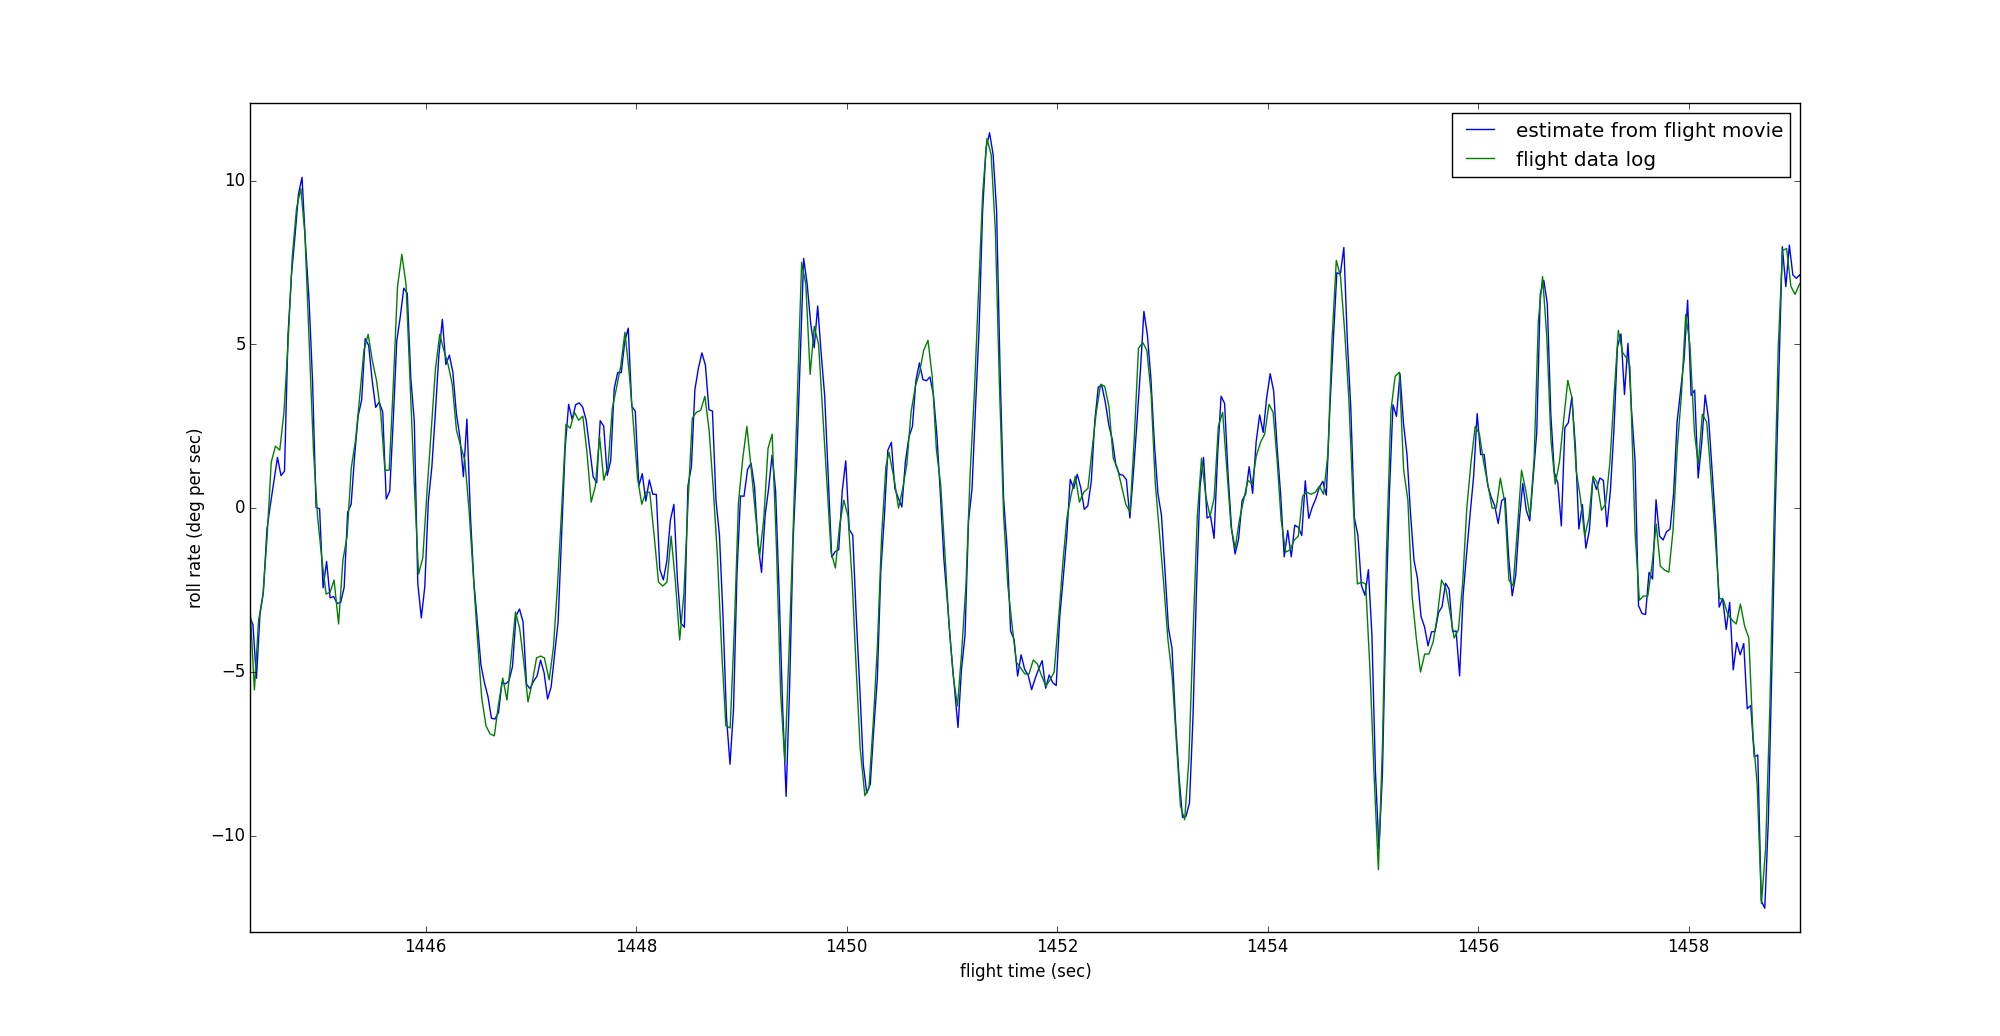
This graph is especially noisy because only a large portion of the outside view is obscured by the nose and the visible portion is further obscured by the propeller. But it is ok, the correlation process is magic and is really good at finding the best true correlation. The next plot shows the results we can attain when we have more idea conditions with an unobstructed view. Here is a plot that shows the video roll estimate and the actual roll gyro are almost perfectly in agreement.
Taking a step back, what did we just do there? Essentially, we have created an automated way to align the video frames with the flight data log. In other words, for any video frame number, I can compute the exact time in the flight log, and for any point in the flight log, I can compute the corresponding video frame number. Now all that is left is to draw the exact current flight data (that we now have a way to find) on top of the video.
I look forward to your comments and questions!
This tutorial is far from complete and I know there are some built in assumptions about my own system and aircraft cooked into the scripts. Please let me know your questions or experiences and I will do my best to answer or improve the code as needed.